How to Colorize Black and White Photos Online Free - Autodraft
Colorizing black and white photos is a fascinating way to bring black and white pictures to life and add a touch of vibrancy to images. Autodraft has revolutionized the way we approach colorization, making it easier than ever before. With just a few clicks, you can transform your black and white images into vivid, colorful representations, preserving their original essence while adding a new dimension.
Autodraft utilizes the capabilities of artificial intelligence to analyze the content of the images and intelligently apply colors to recreate a lifelike appearance.
In the following sections, we will explore the steps involved in colorizing black and white photos online into vibrant color and can you colorize old photos?
How to make black and white photo to colour?
Steps on Using an Autodraft to Colorize Photos:
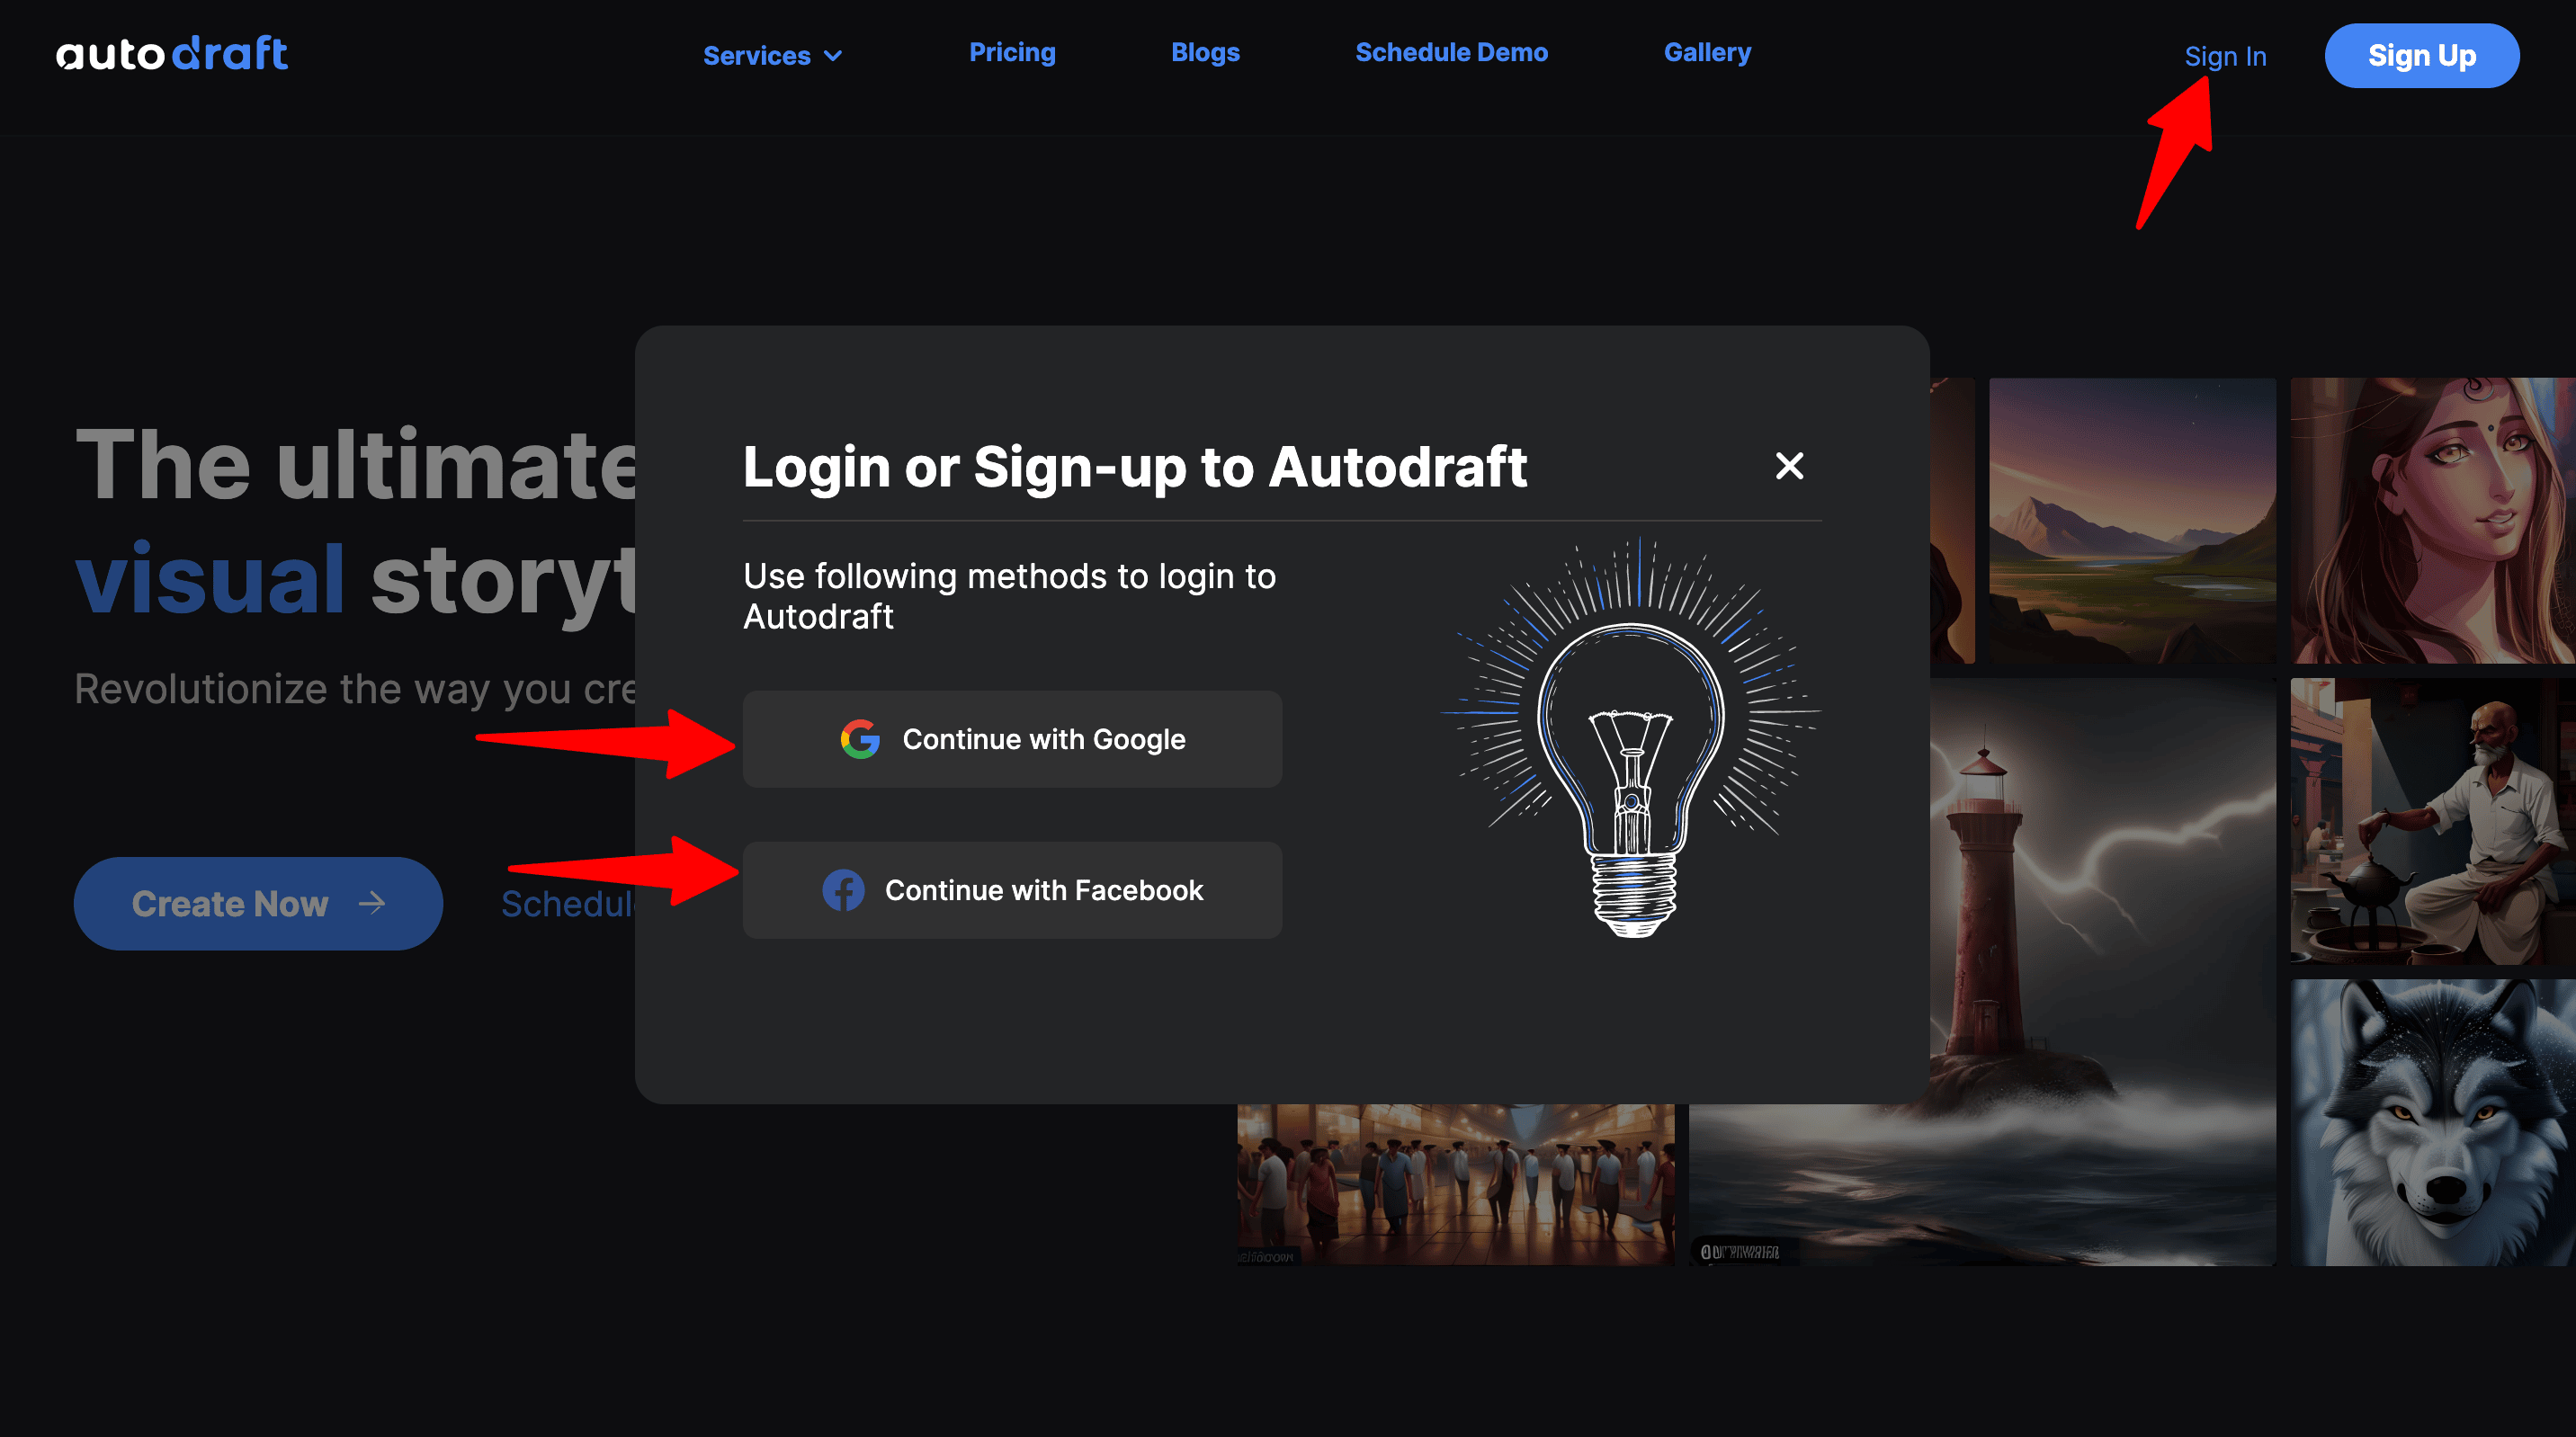
- Upload the Black and White Photo to Autodraft: Access Autodraft through a web browser and sign in/sign up.
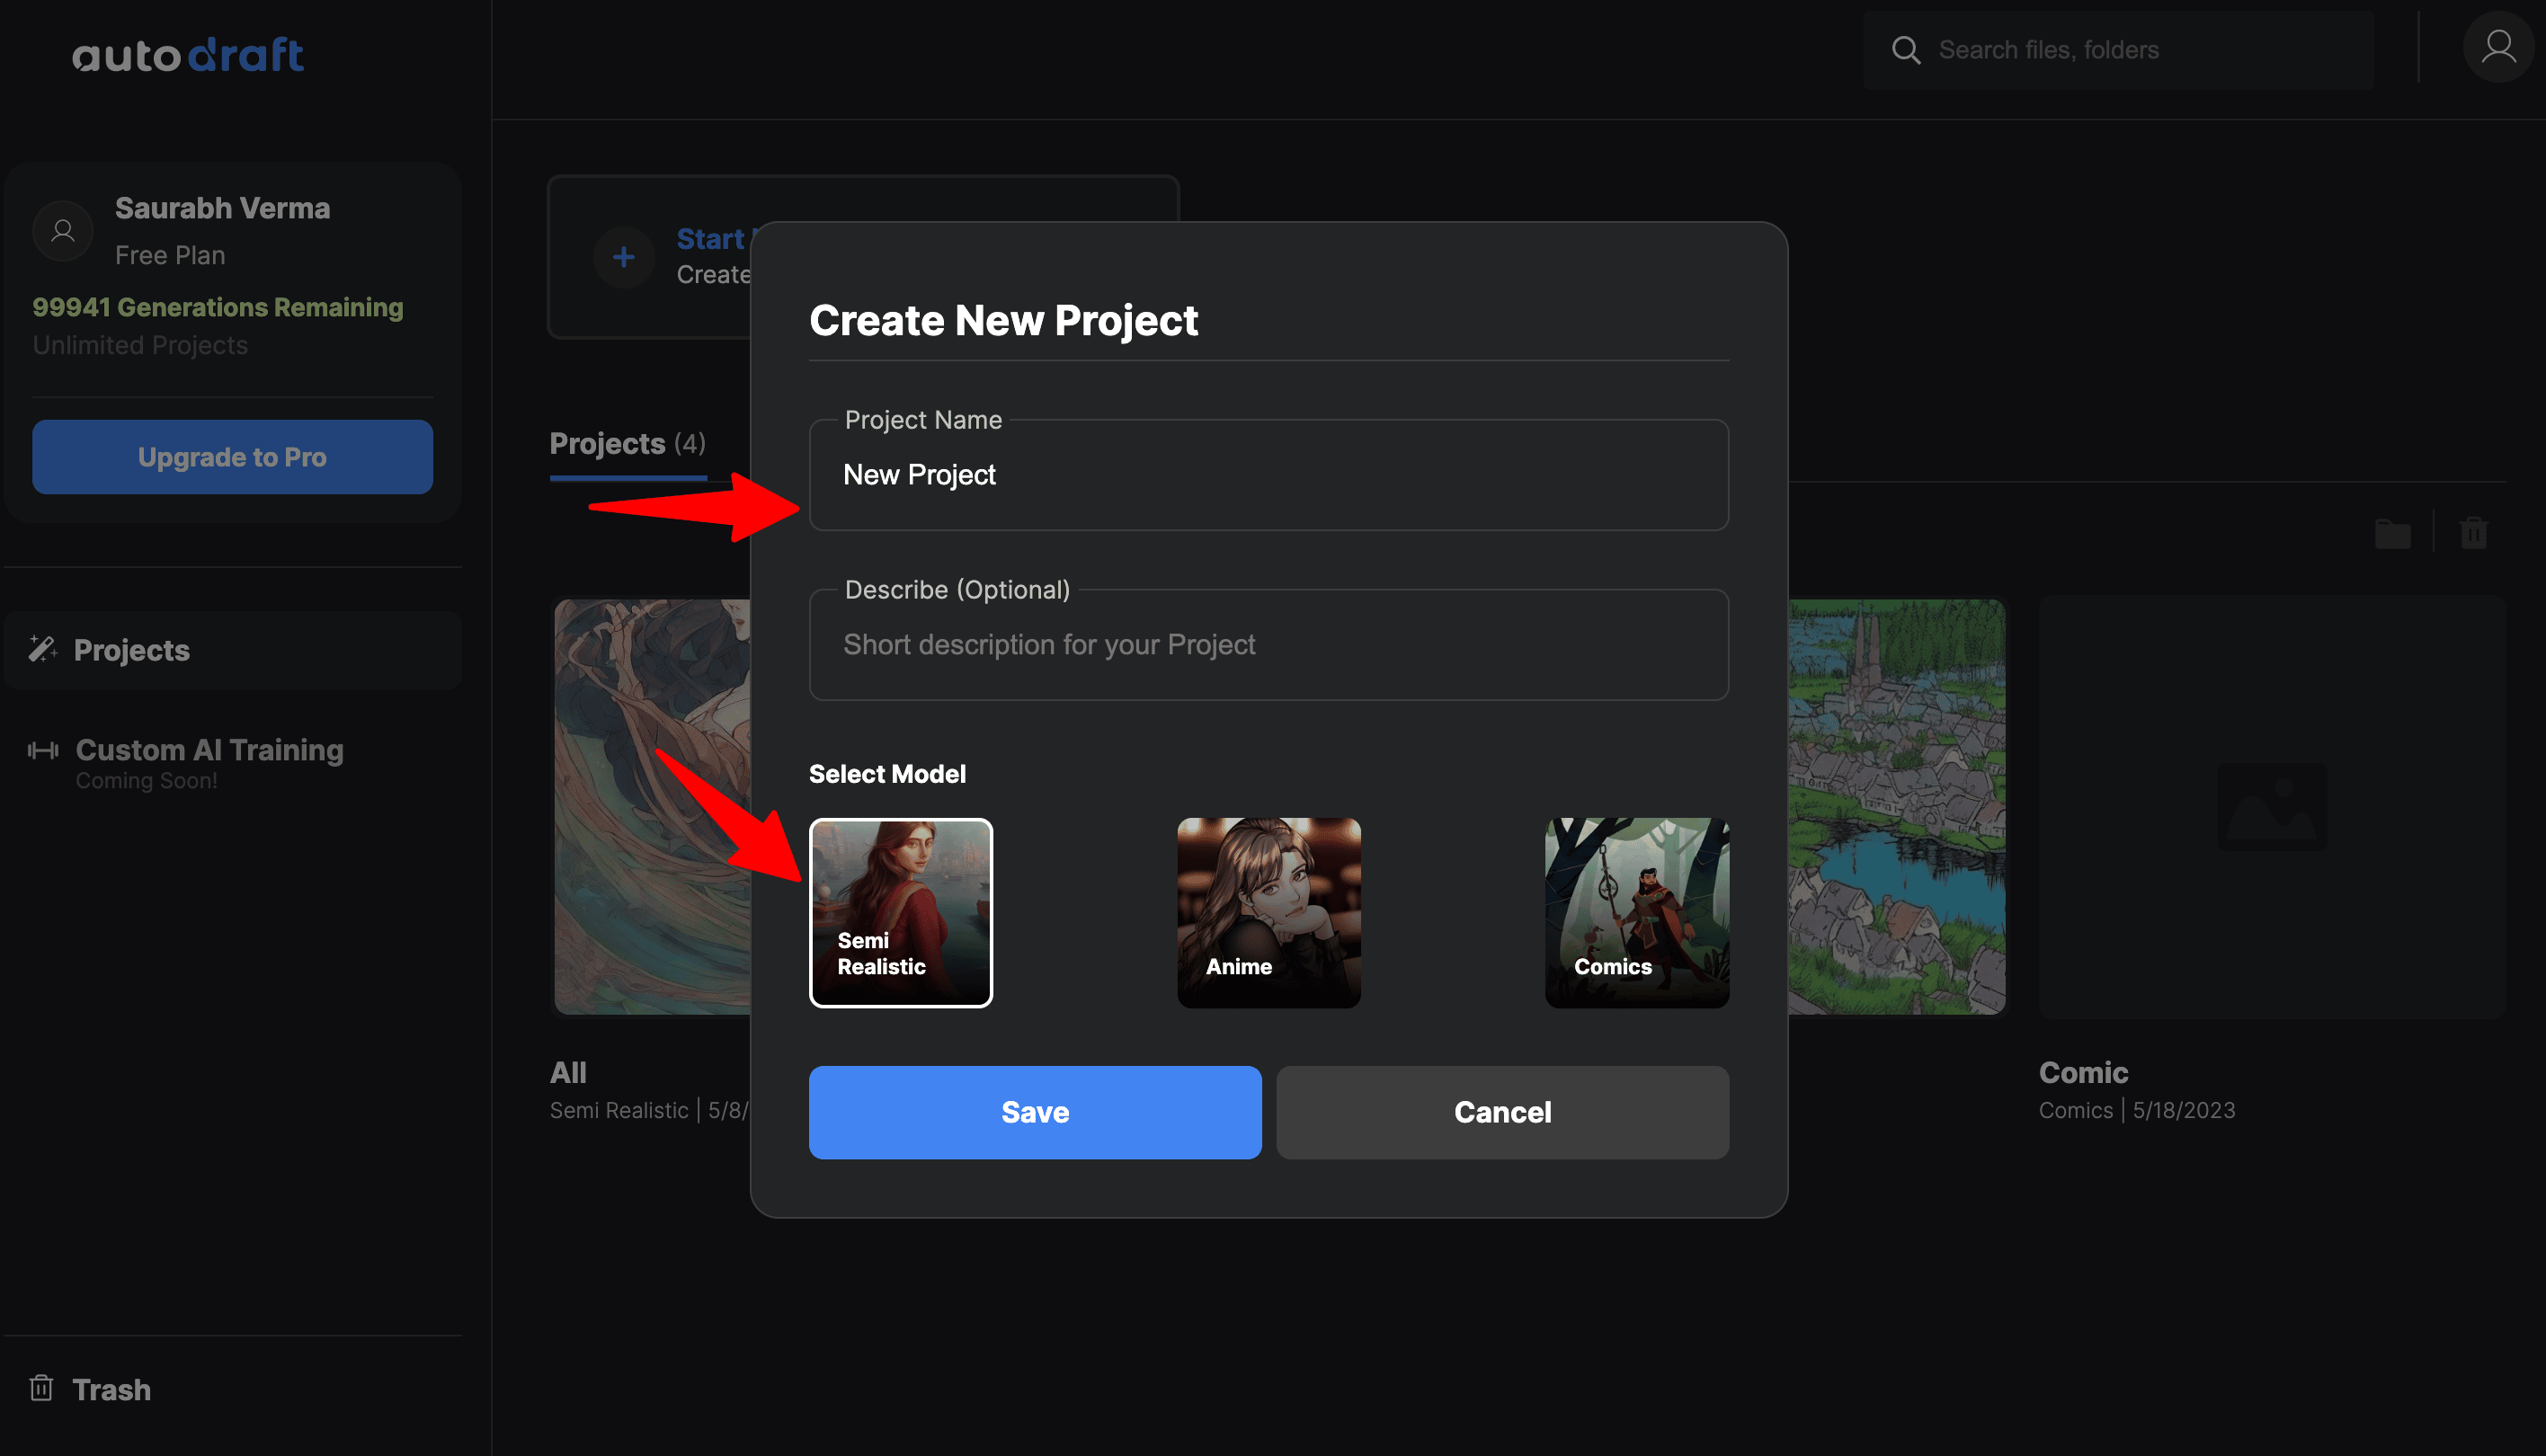
The following screen would open. Click on Start New Project. Give it a Project Name and select Model. You can choose any model according to your needs, we'll use Semi Realistic for demonstration.
The creation screen will open.
-
Select the Desired Settings or Options for Colorization:
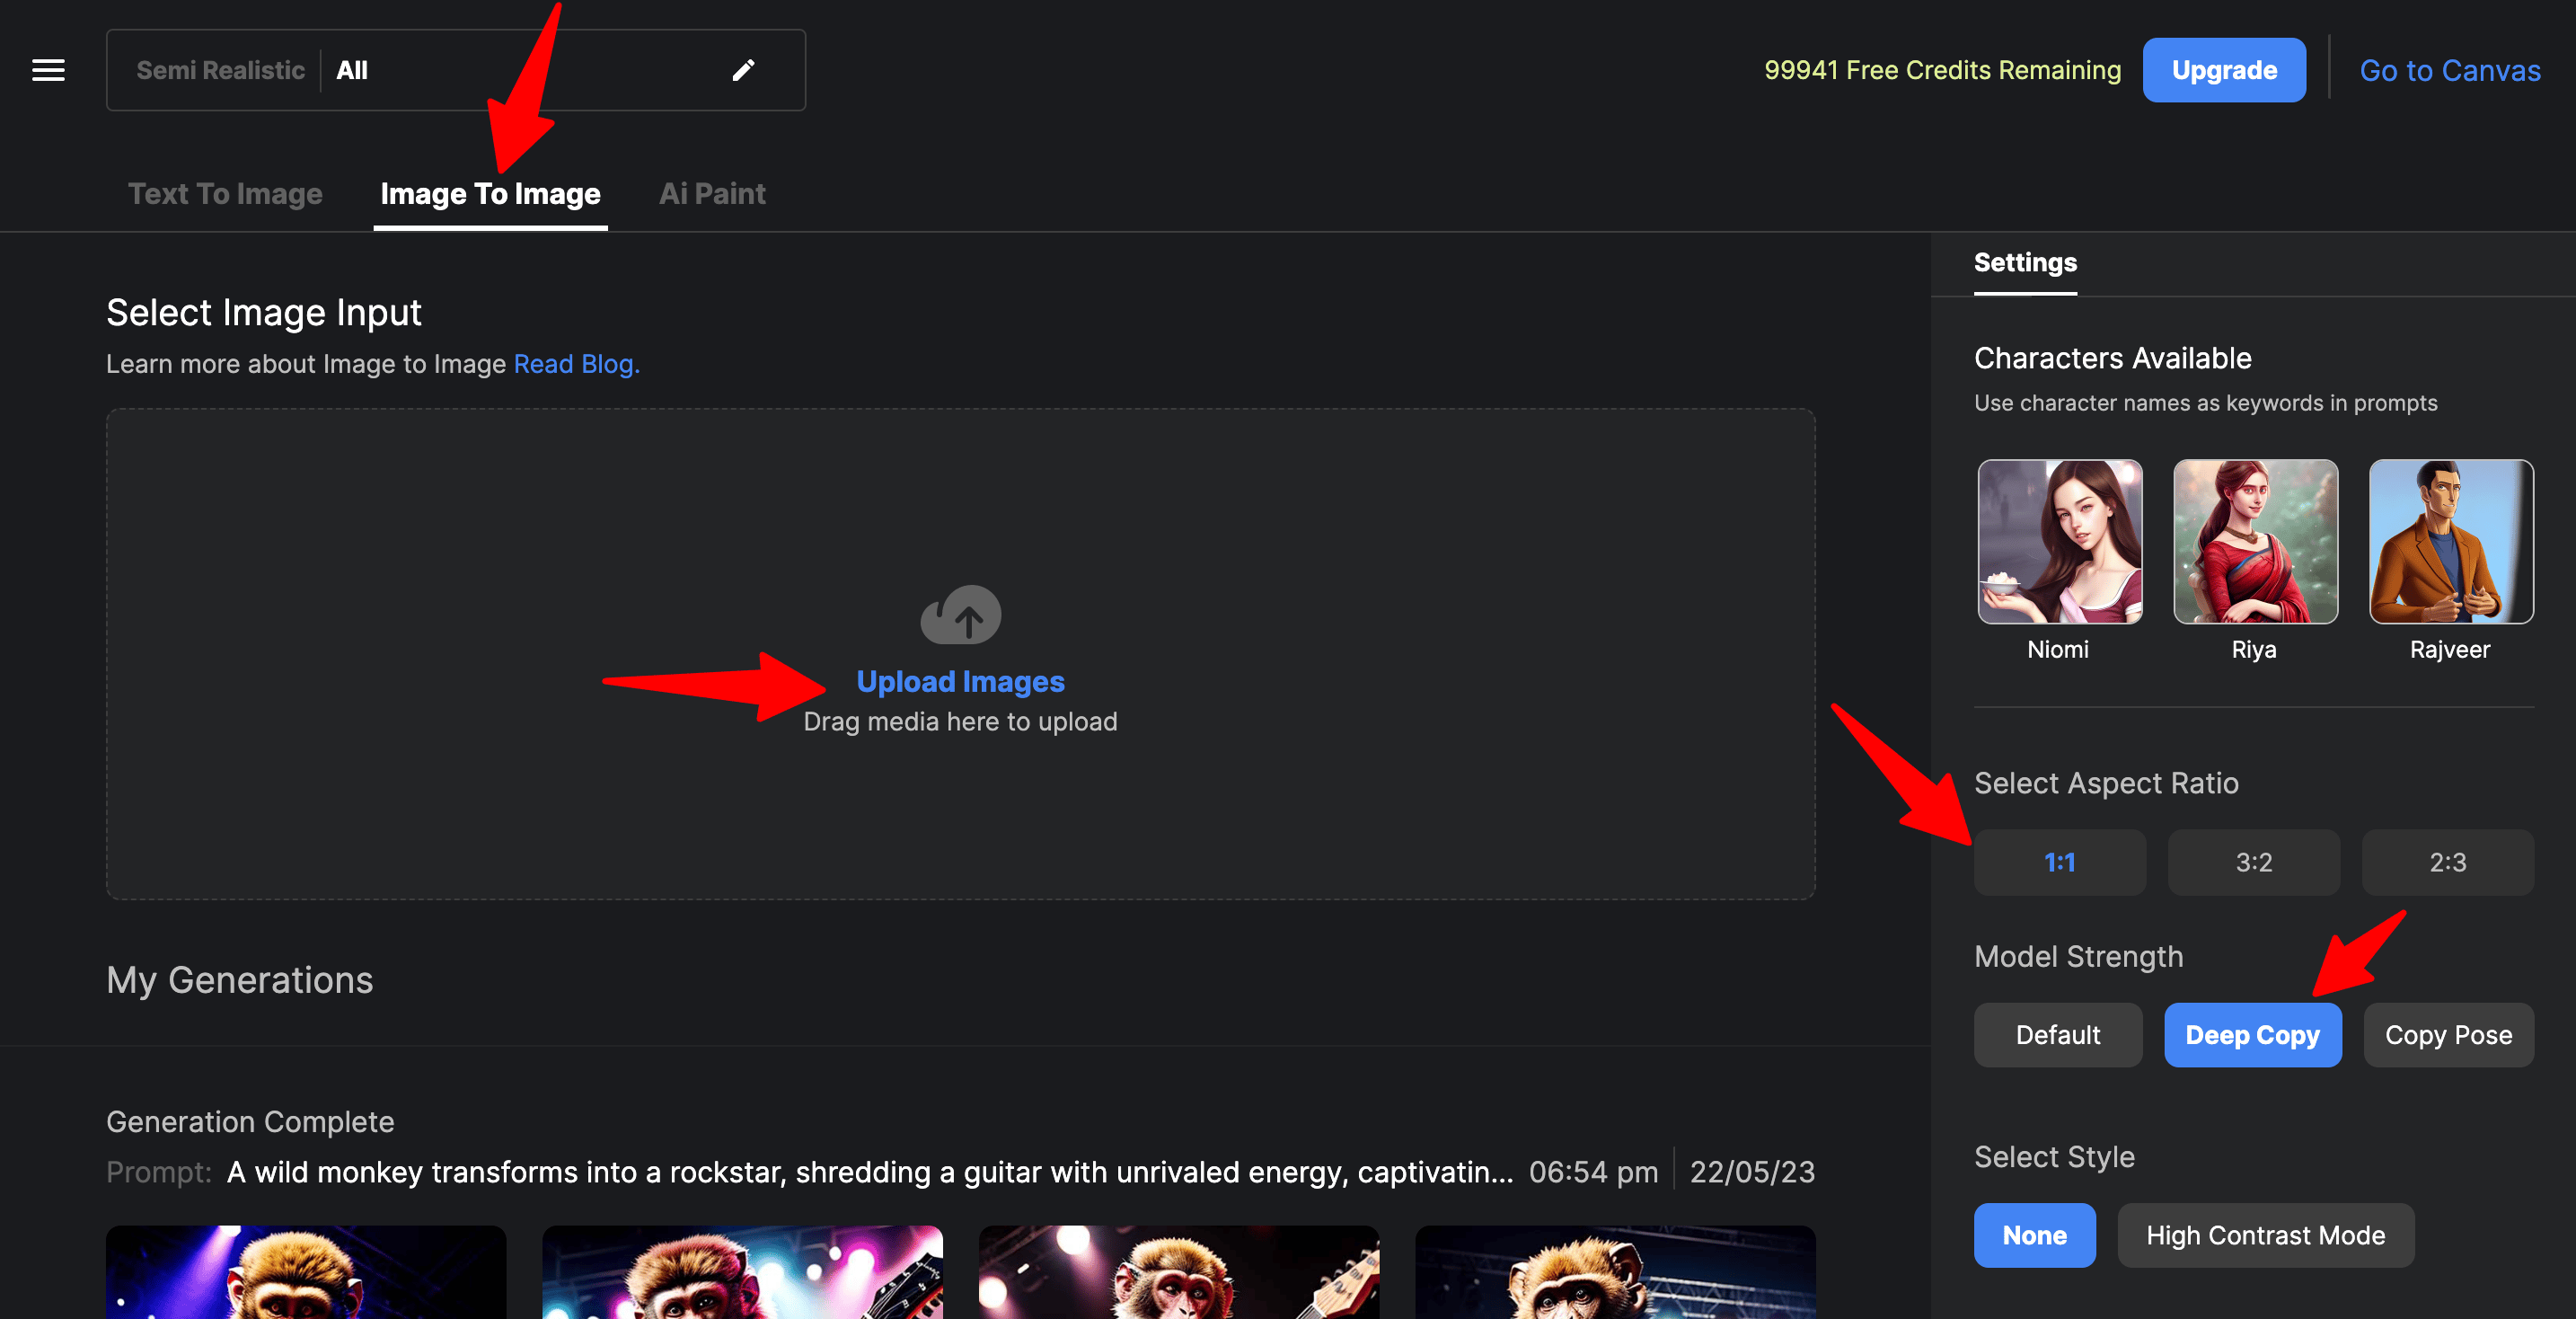
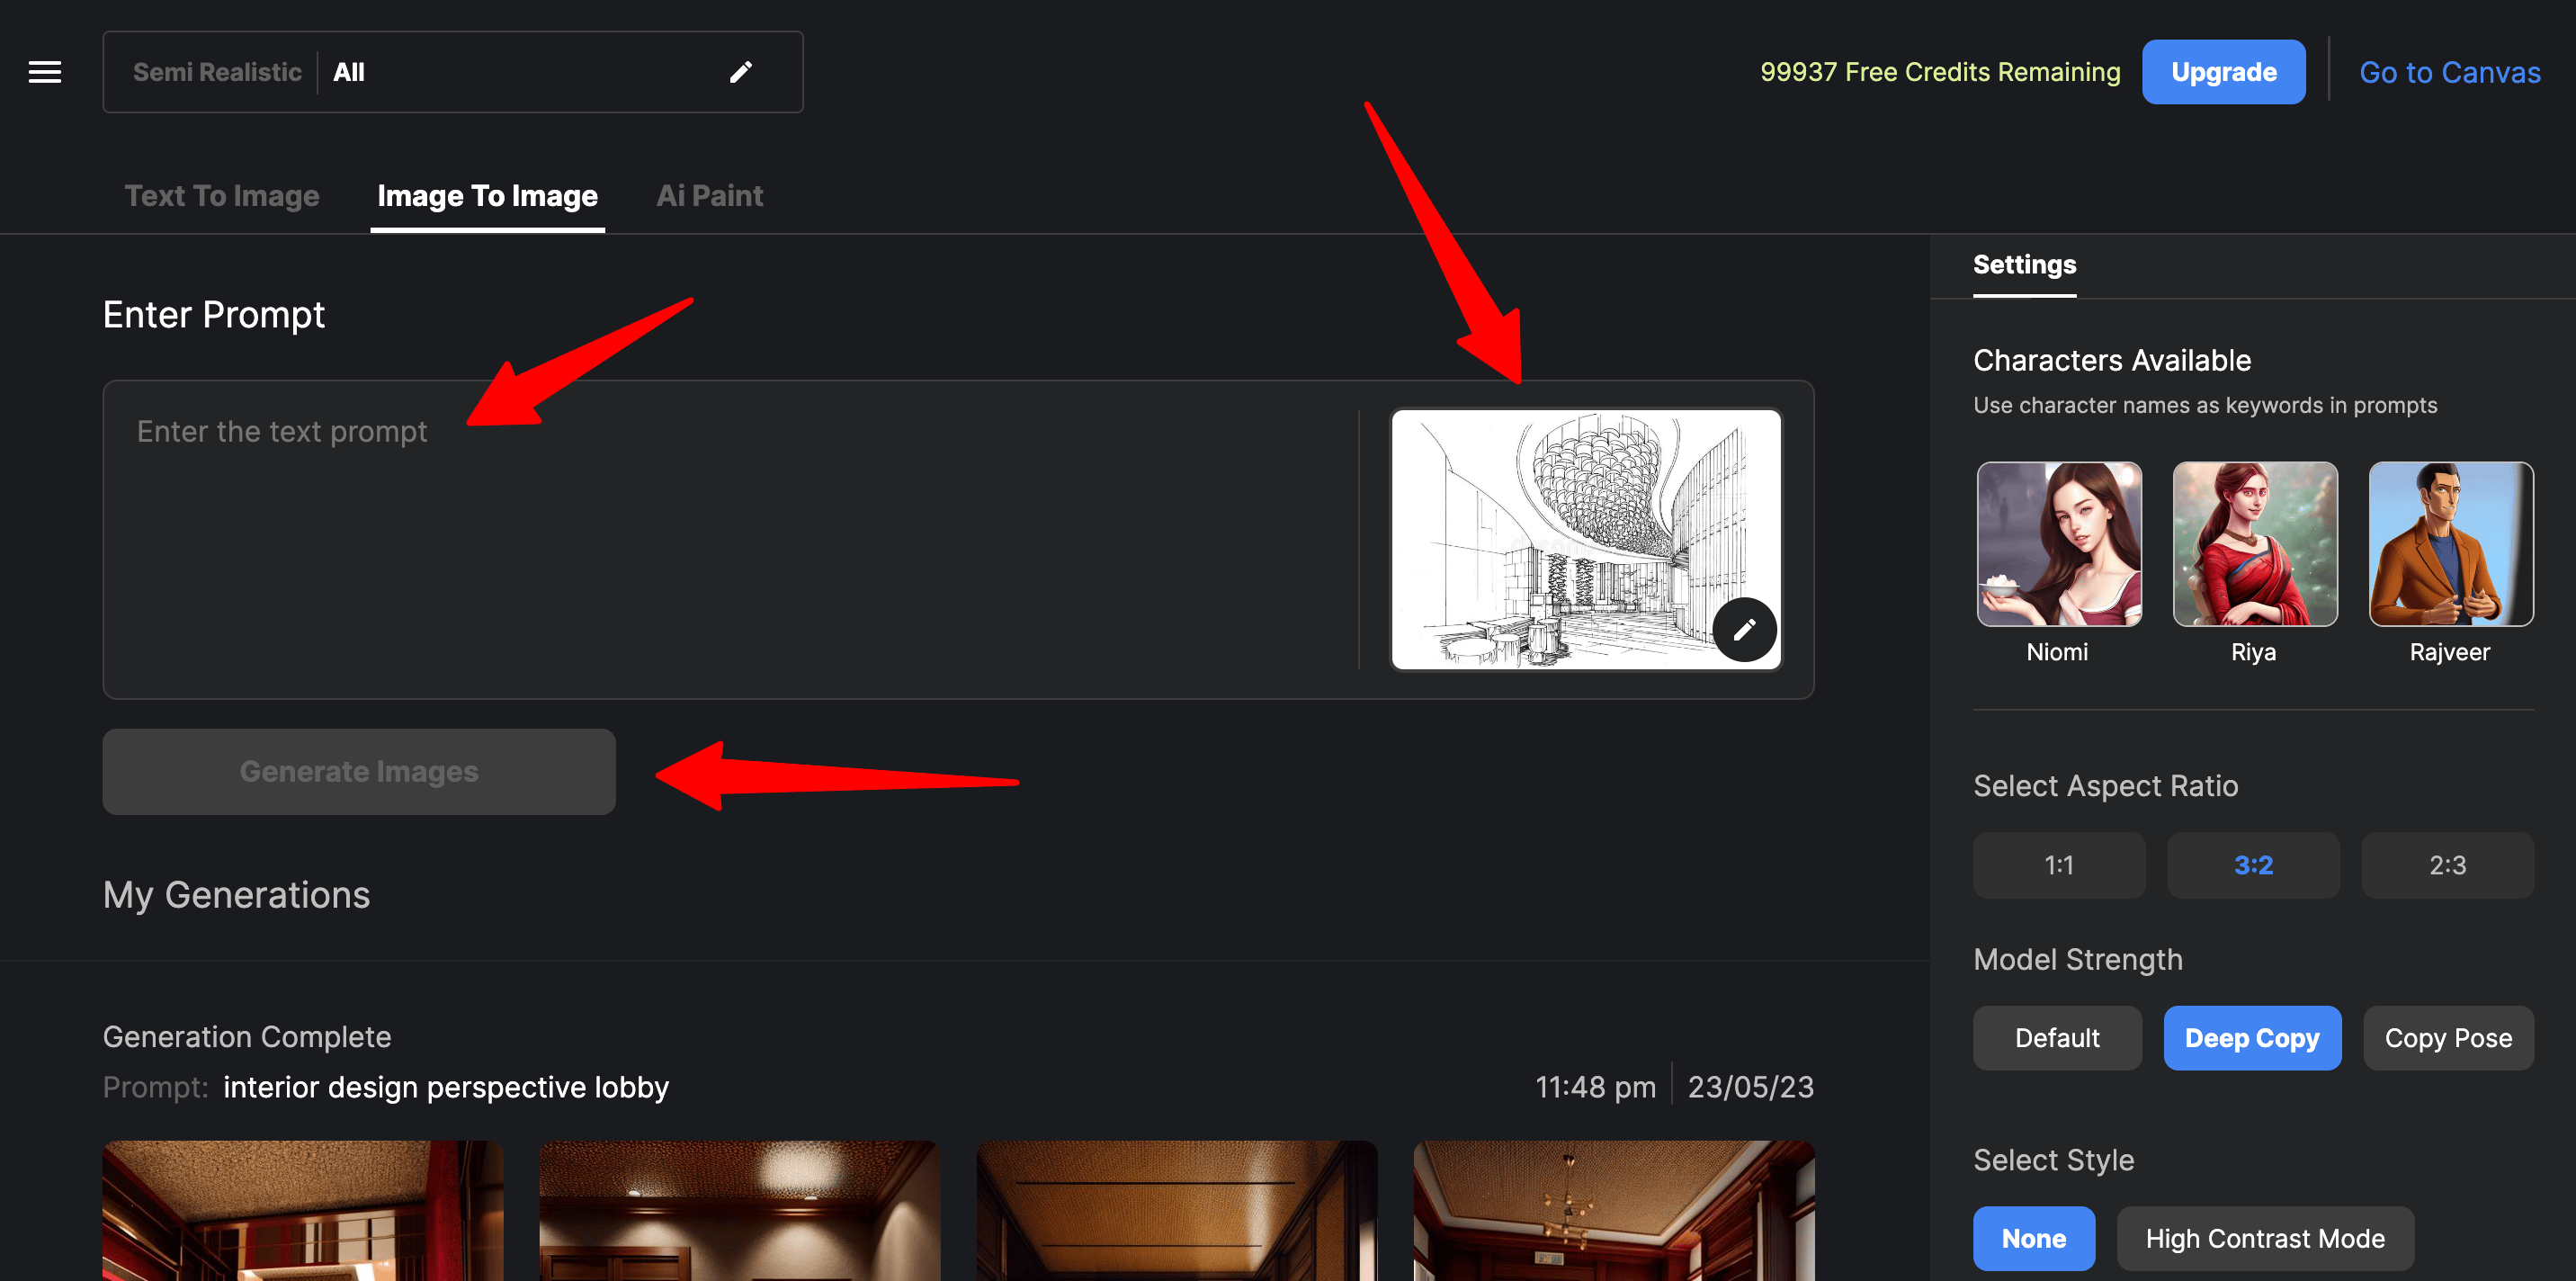
Click on Image to Image and then Upload Image. For Aspect Ratio Autodraft will ask to arrange the black and white picture into 1:1(square), 3:2(landscape), or 2:3(portrait) formats. Choose Deep Copy in model strength. It simply detects the edges in the picture and replicates them in the output.
You have 2 options to pick from Styles, choose whichever suits you the best. We'll move forward with None. Experiment with the available choices to achieve the desired effect for your photo.
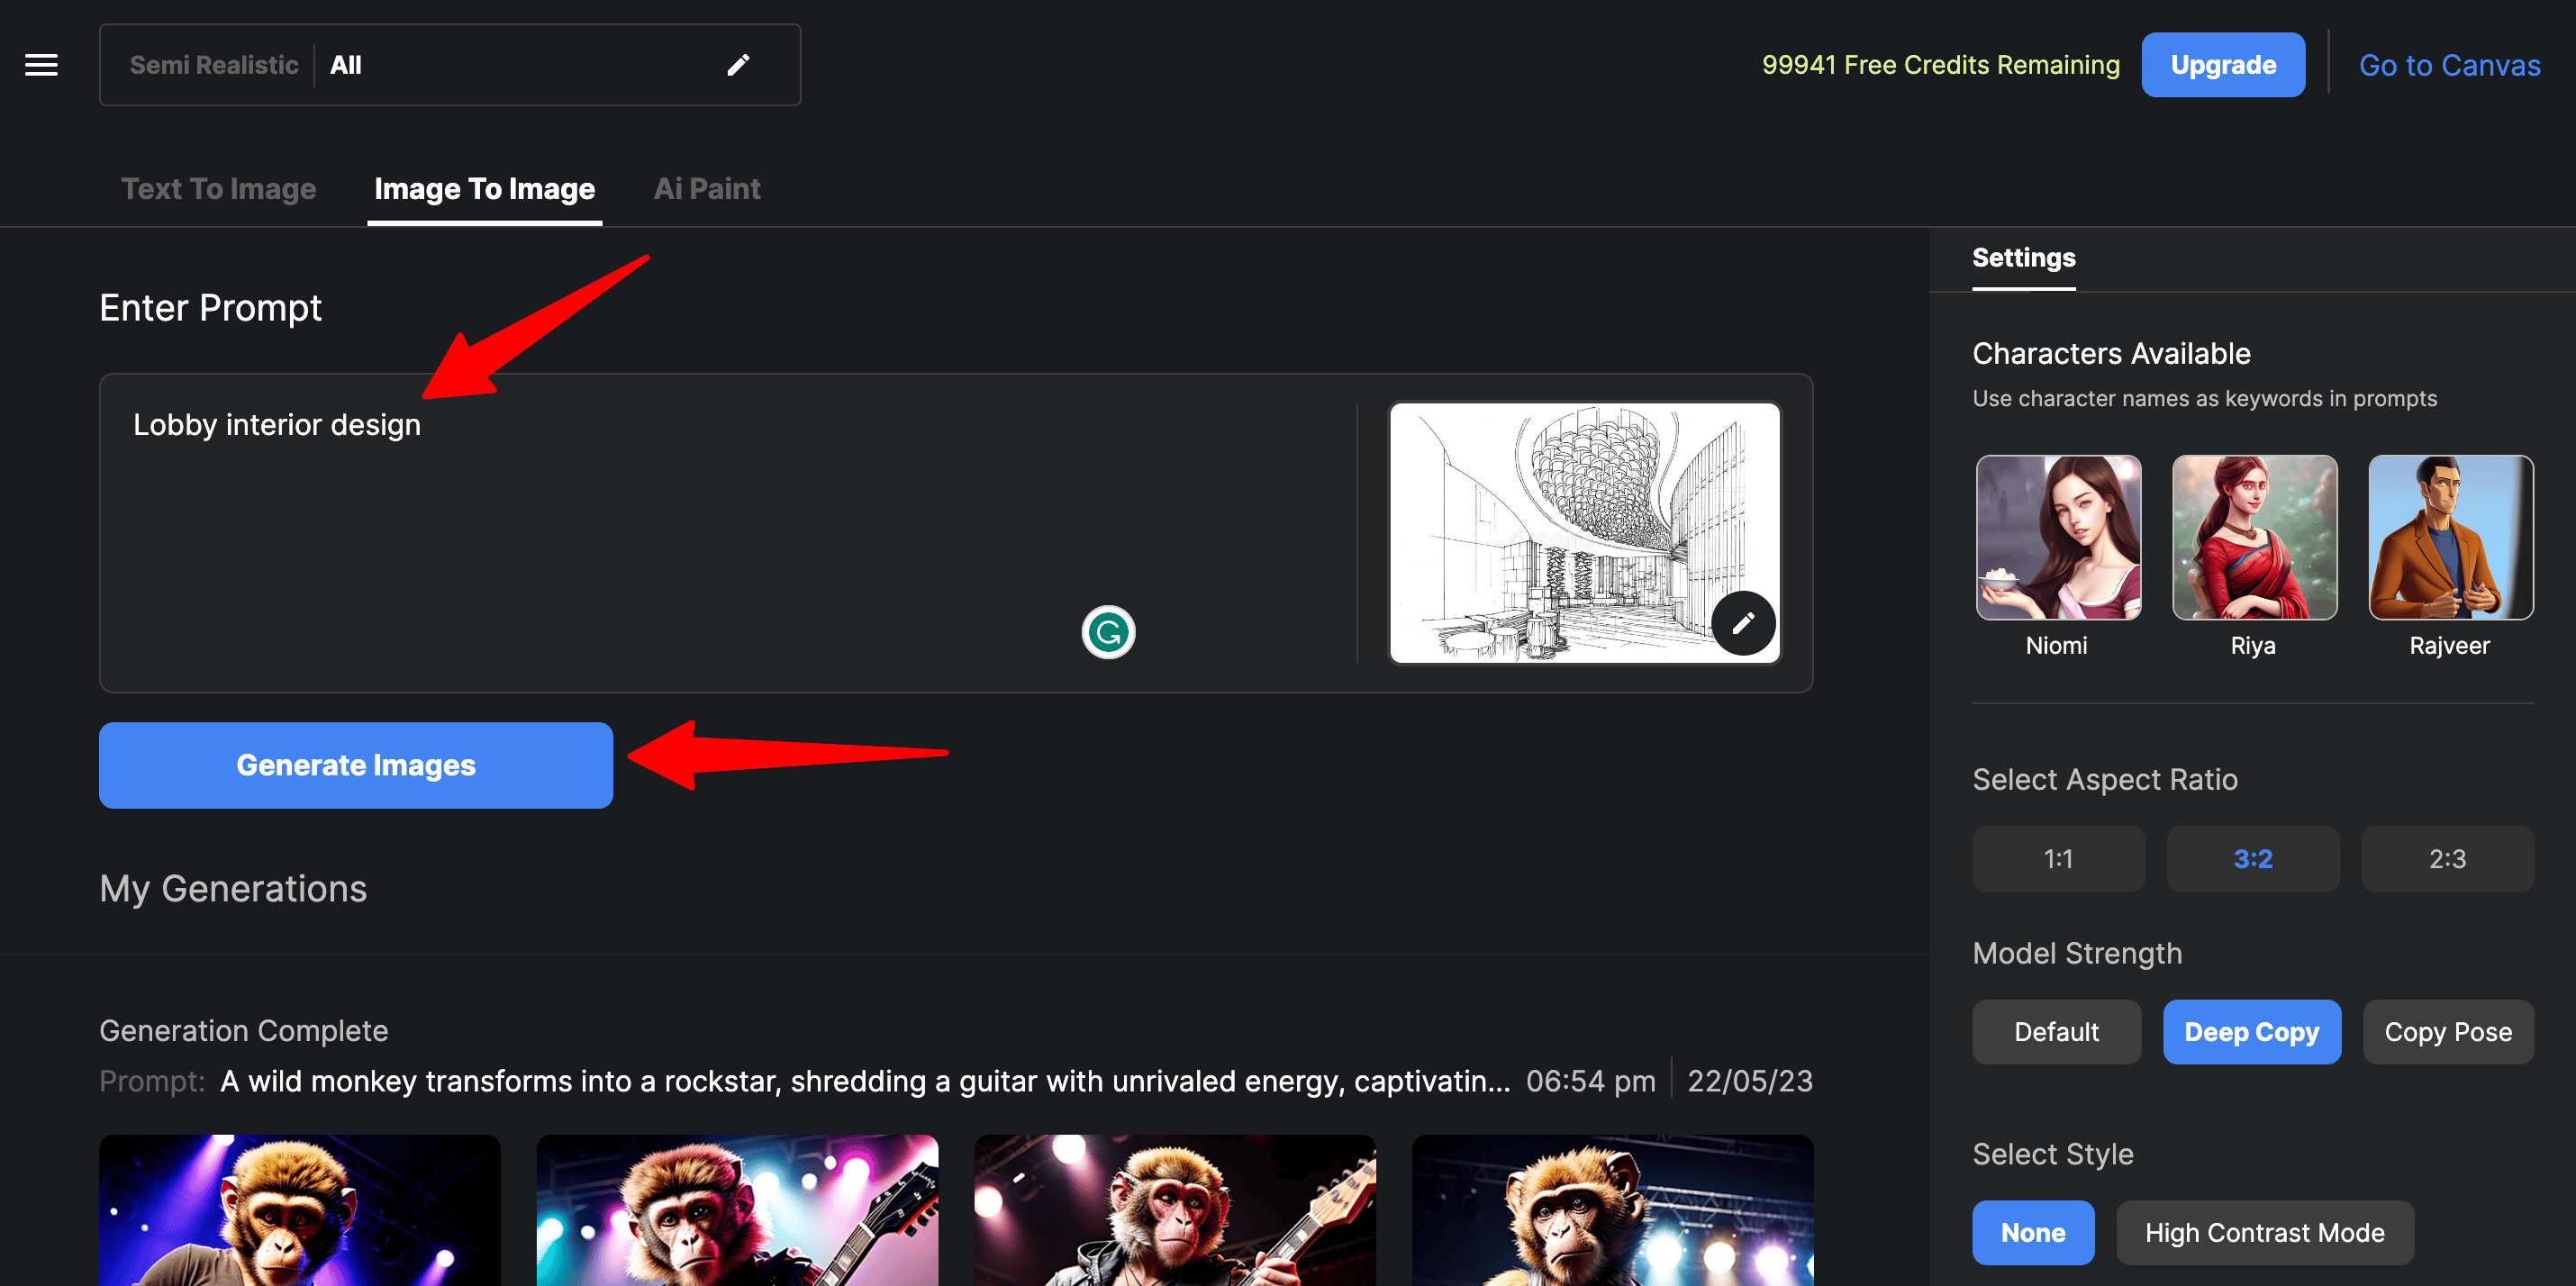
Move towards the final step of Enter Prompt. Be descriptive and mention all the things you want in the output image (like any specific colours- blue sky, black shirt, yellow flower), or add some extra things in the input image (like- bottle on the table, birds in the sky). For now, we'll keep it simple and use the following:
Prompt: Lobby interior design
-
Initiate the Colorization Process:
After selecting the desired settings, initiate the colorization process by clicking on the Generate Images. The AI algorithm will analyze the photo's content and apply colors accordingly. Depending on the complexity of the image and the autodraft's processing power, this step may take a few seconds or minutes.
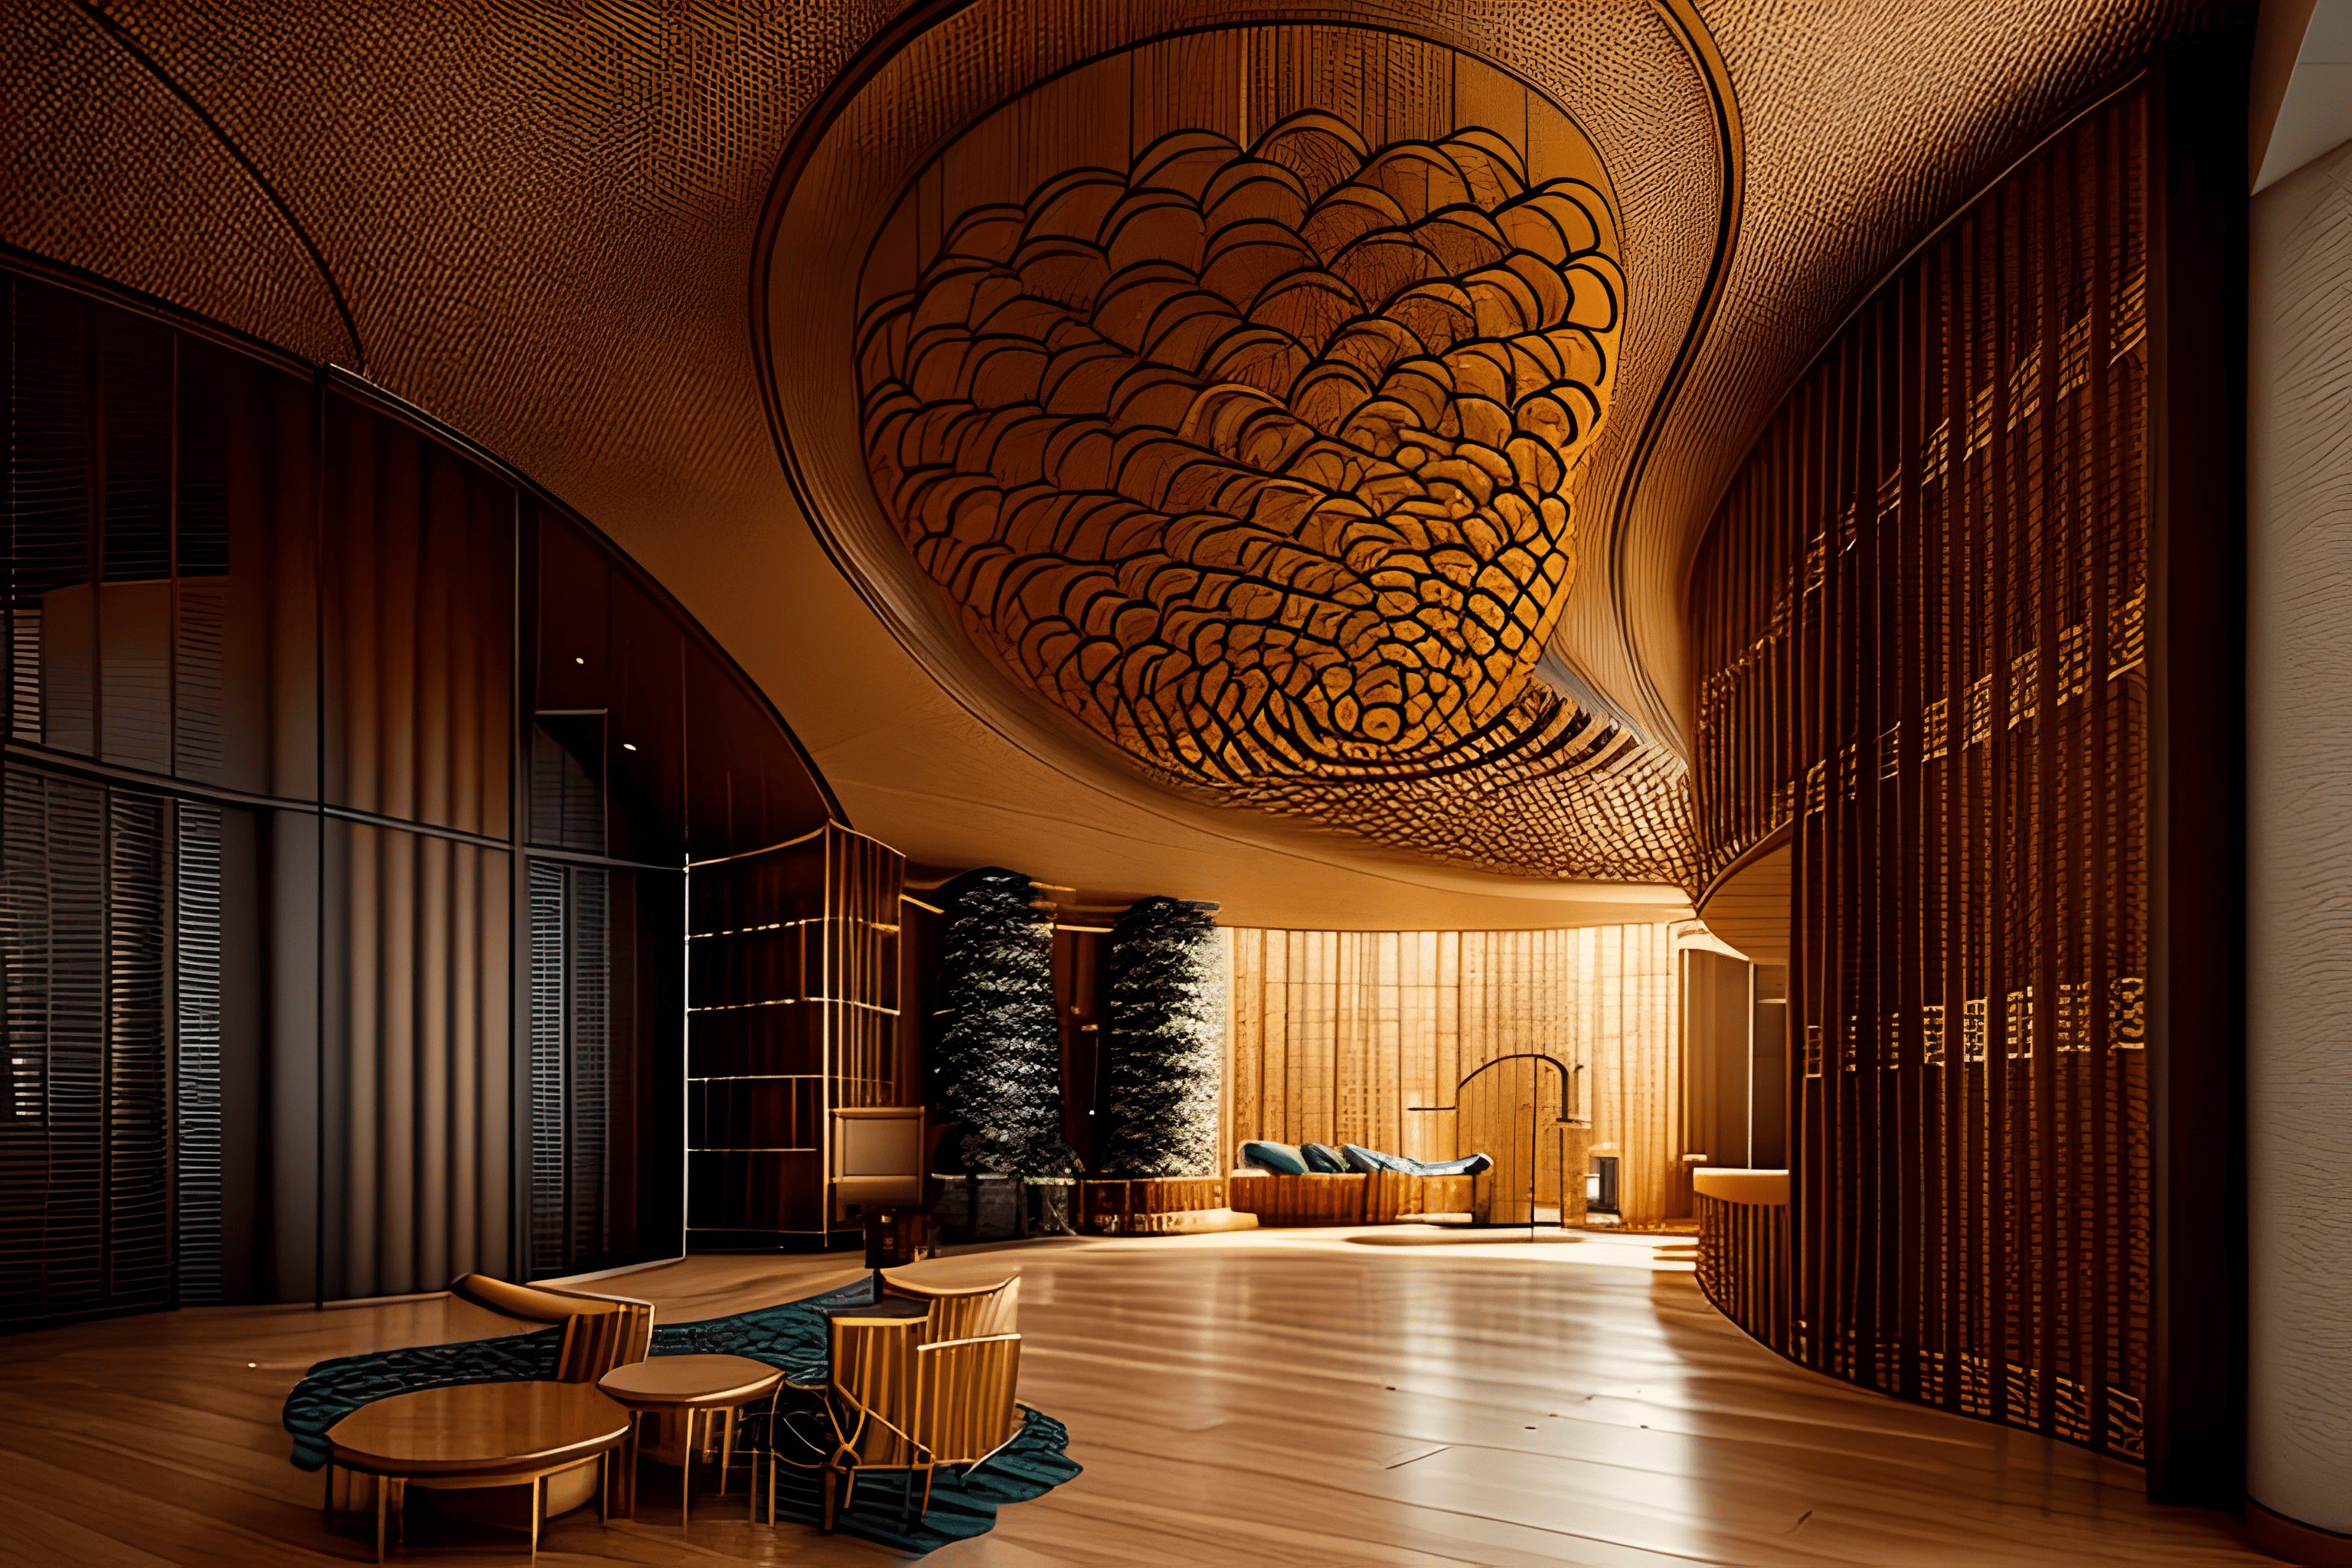
Here is the final output generated by autodraft:
-
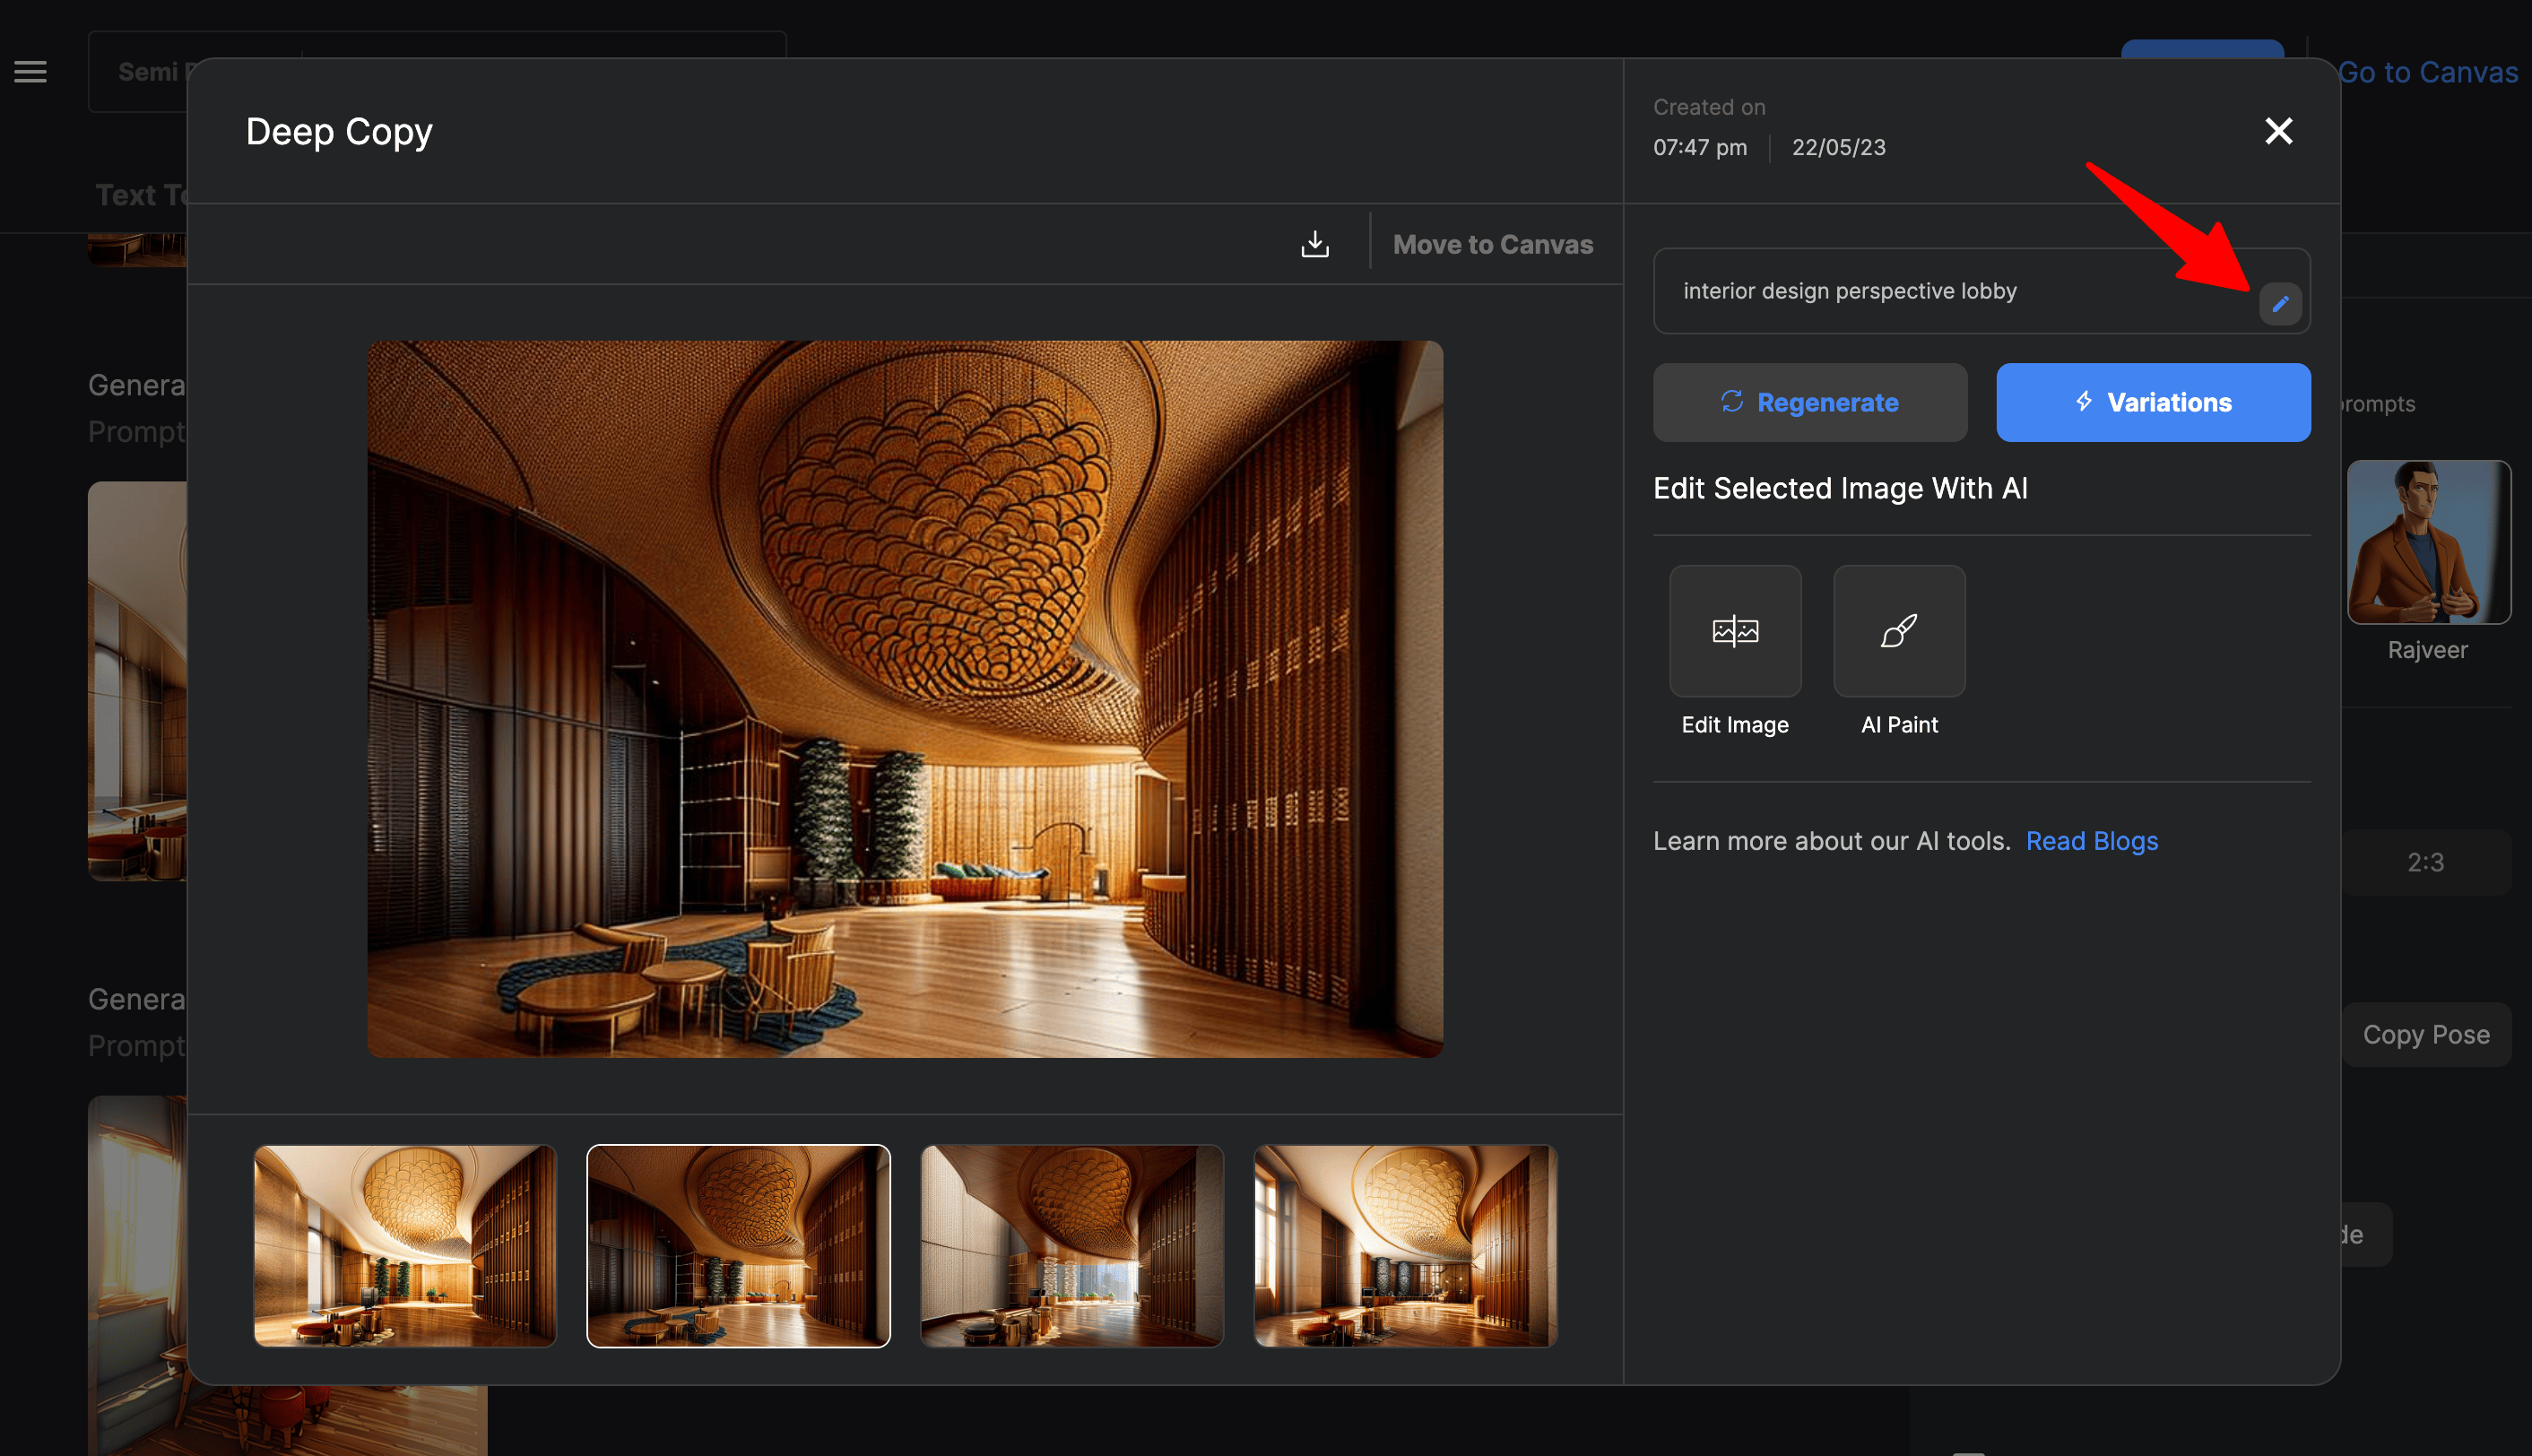
Preview and Fine-Tune the Results, if Necessary:
Once the colorization process is complete, autodraft will display the colorized version of your photo. Take a moment to preview the results and assess the overall appearance.
If adjustments are needed, you can choose any of the generated image to make changes. Just click on the pencil icon and it will redirect to the start. Here you can make the required changes in the prompt to refine the colors, enhance details, or apply additional effects.
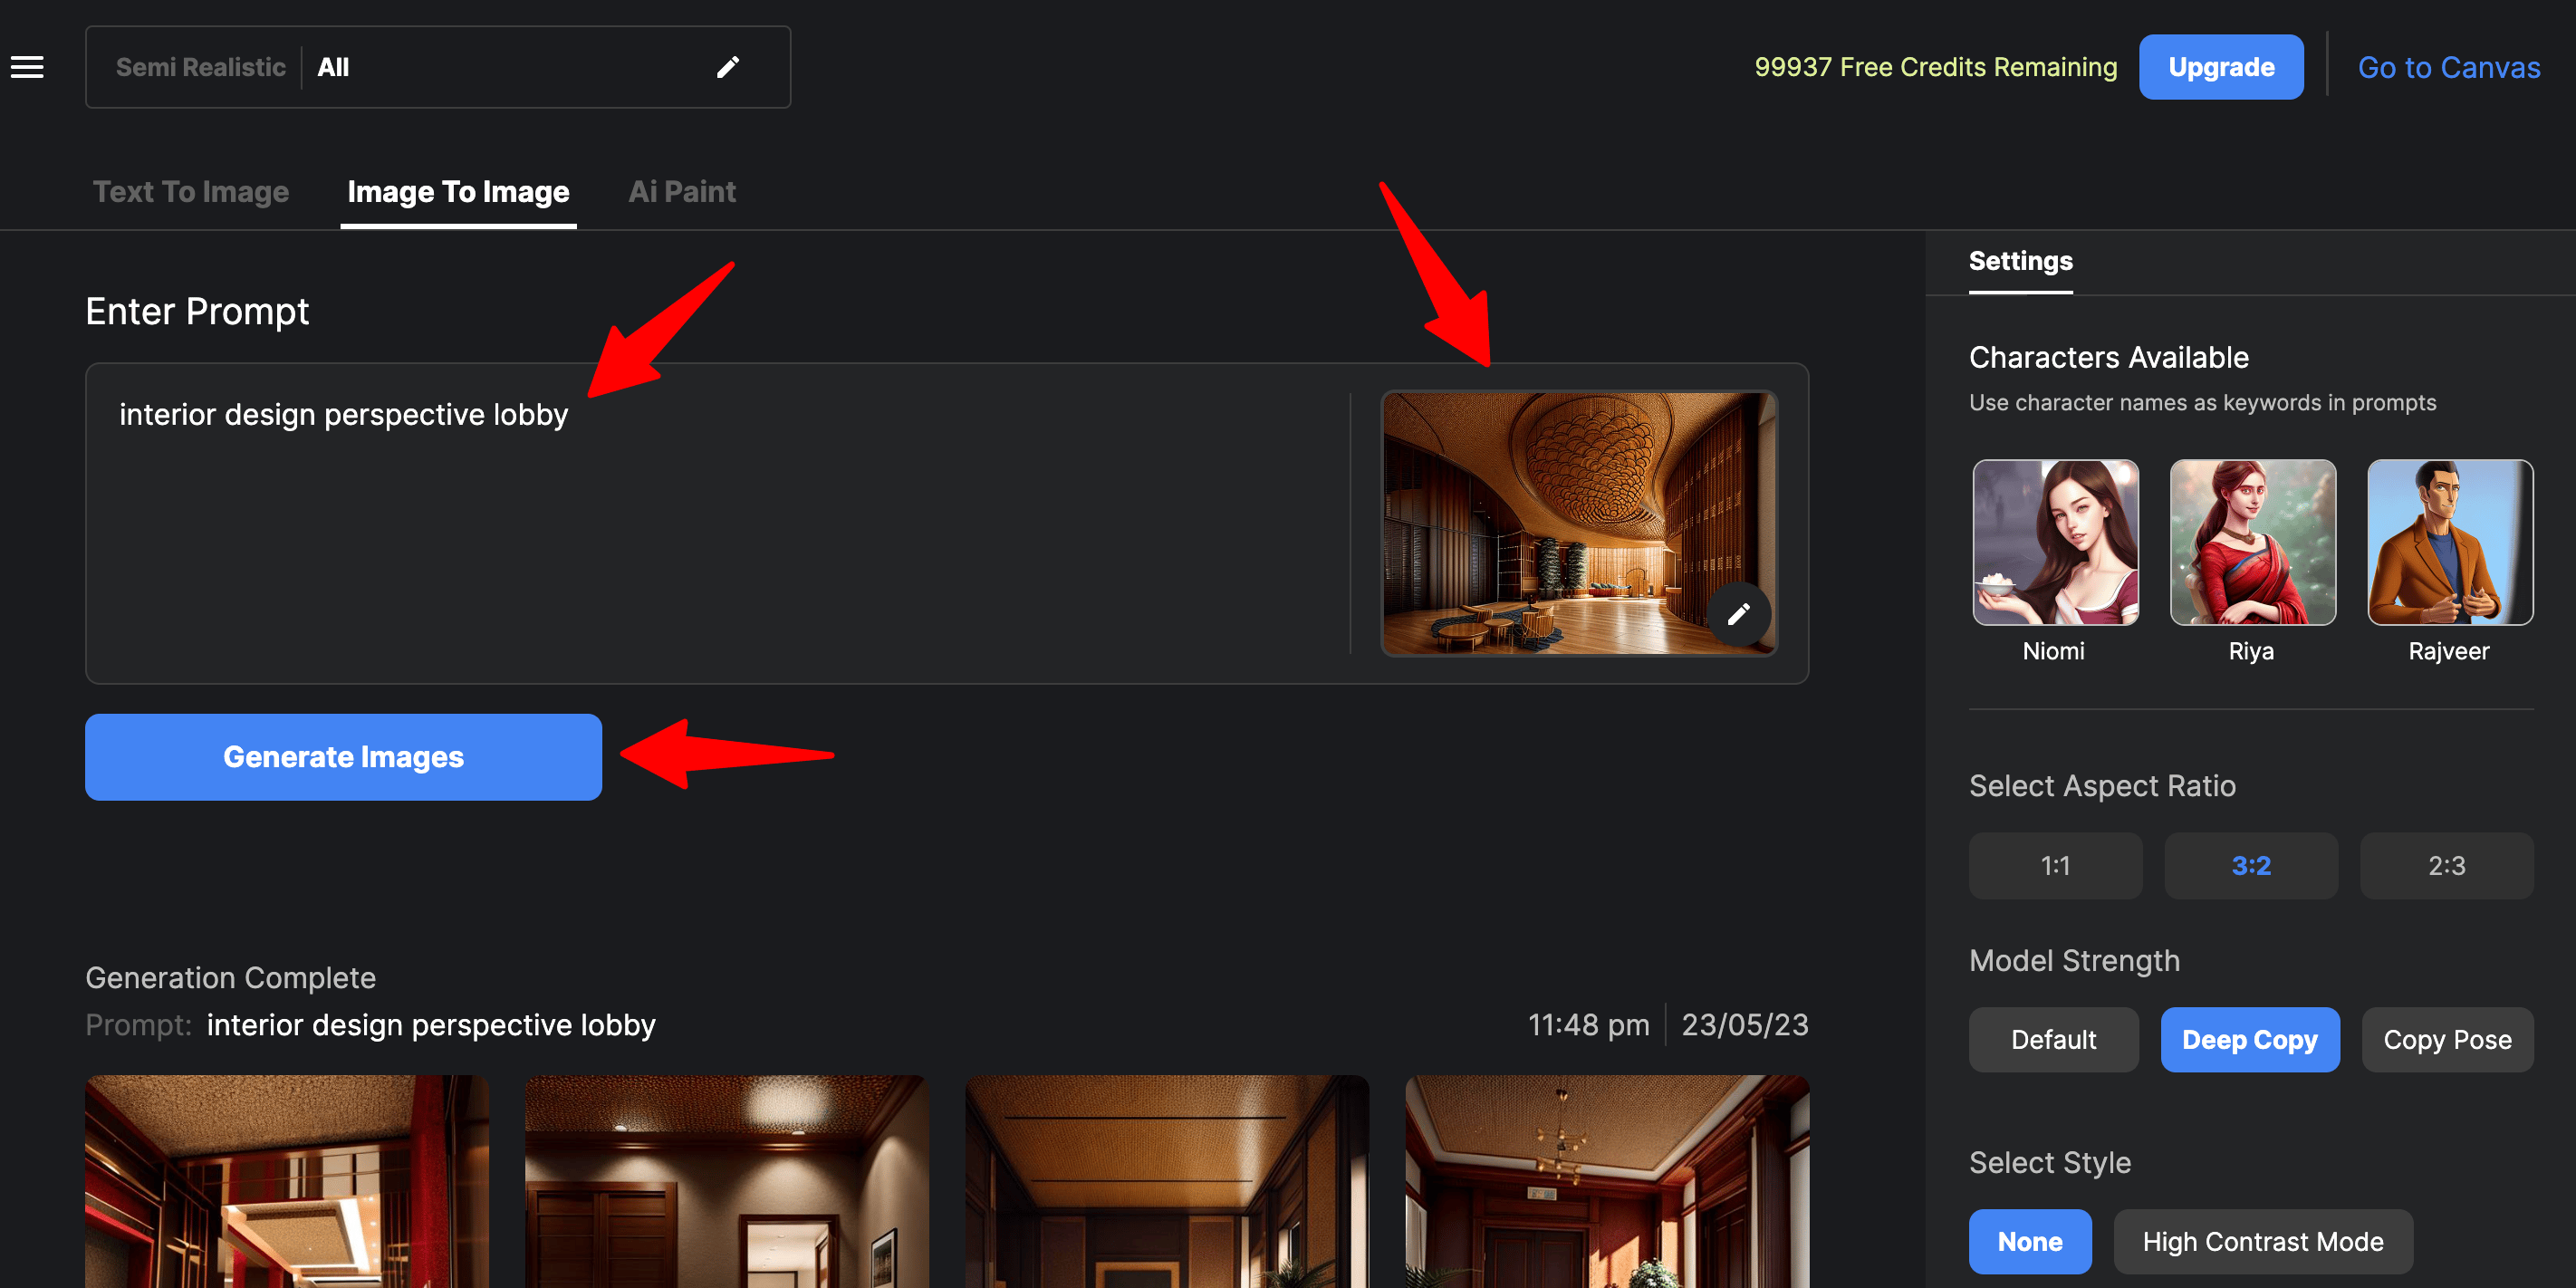
If you want to make changes to the original image, just scroll to the top and now upload the image and repeat the process again until you get the desired output.
-
Upscale and Download the Colorized Version of the Photo:
When you are satisfied with the colorization outcome, you can further upscale the image to a higher resolution which enhances the image quality.
Note: Since autodraft's UI is constantly been updated with new features and designs, for now, the Upscale Image feature is present in the autodraft's old Canvas interface. Need not worry, very soon you would be able to upscale the images in the new interface.
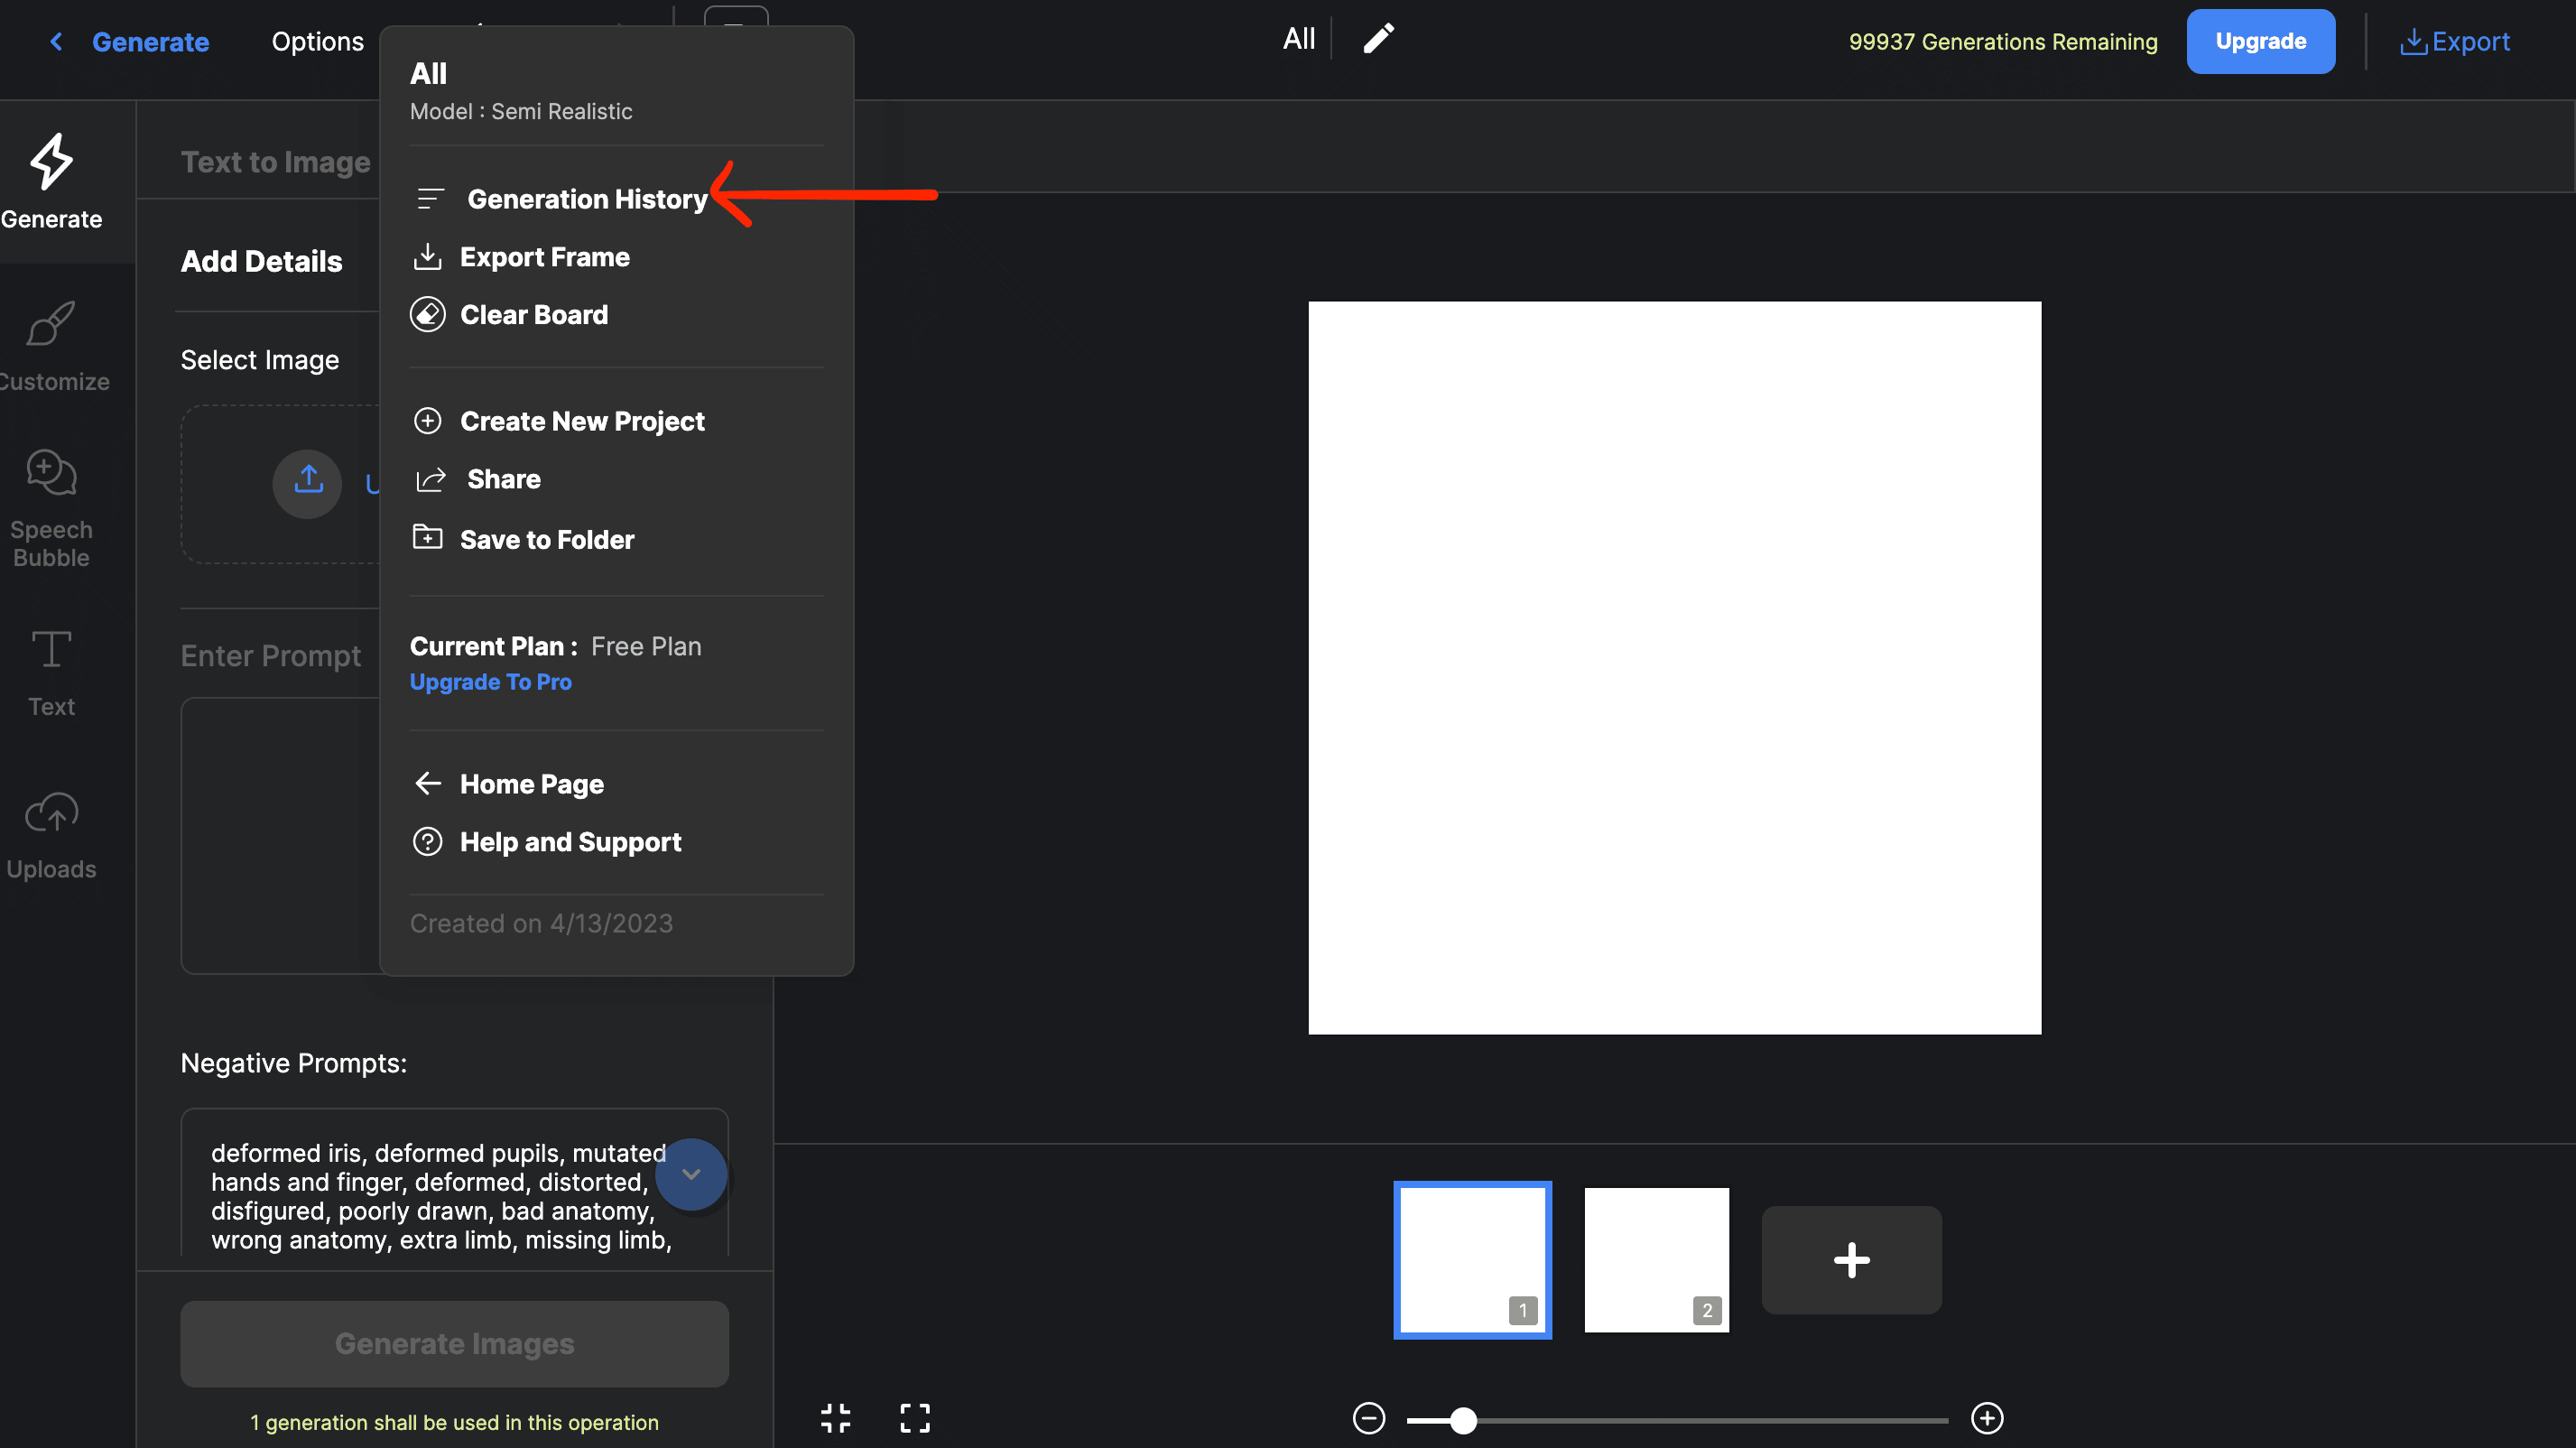
For upscaling the picture click on the Go to Canvas. It will take you to the old interface. Now click on Image to Image >> Option >> Generation History on the top.
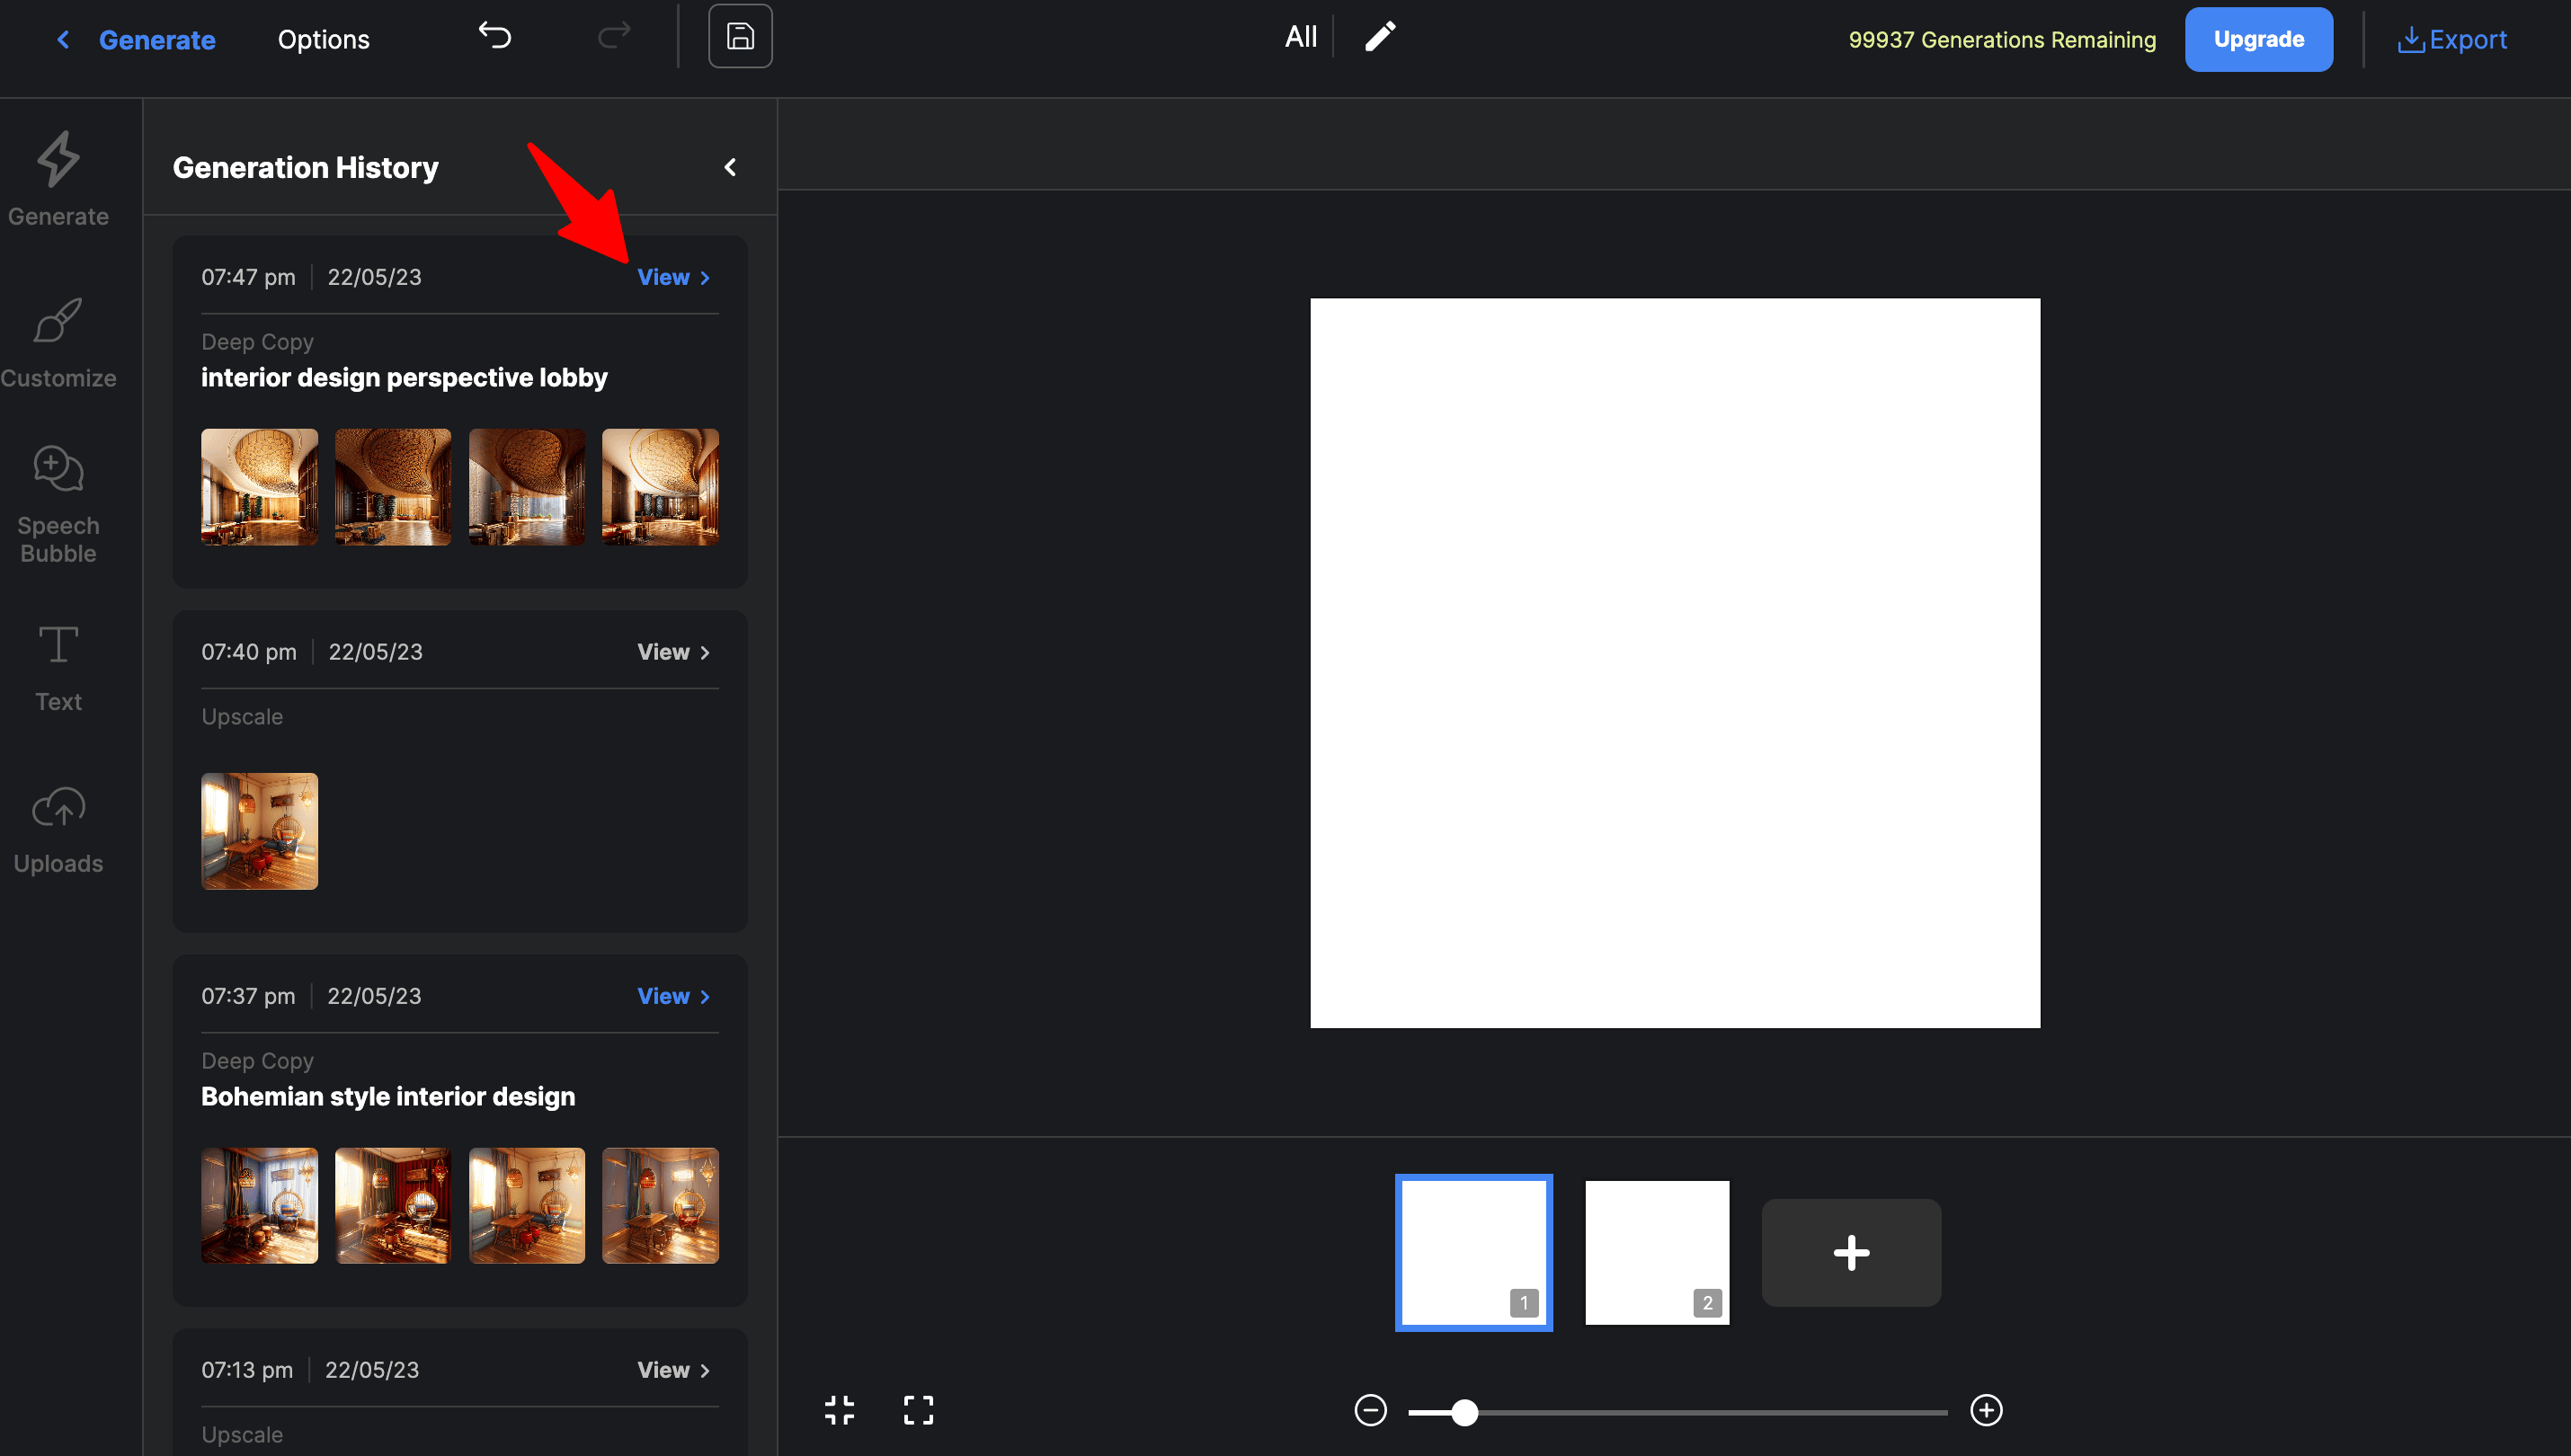
Click on View for opening the required picture.
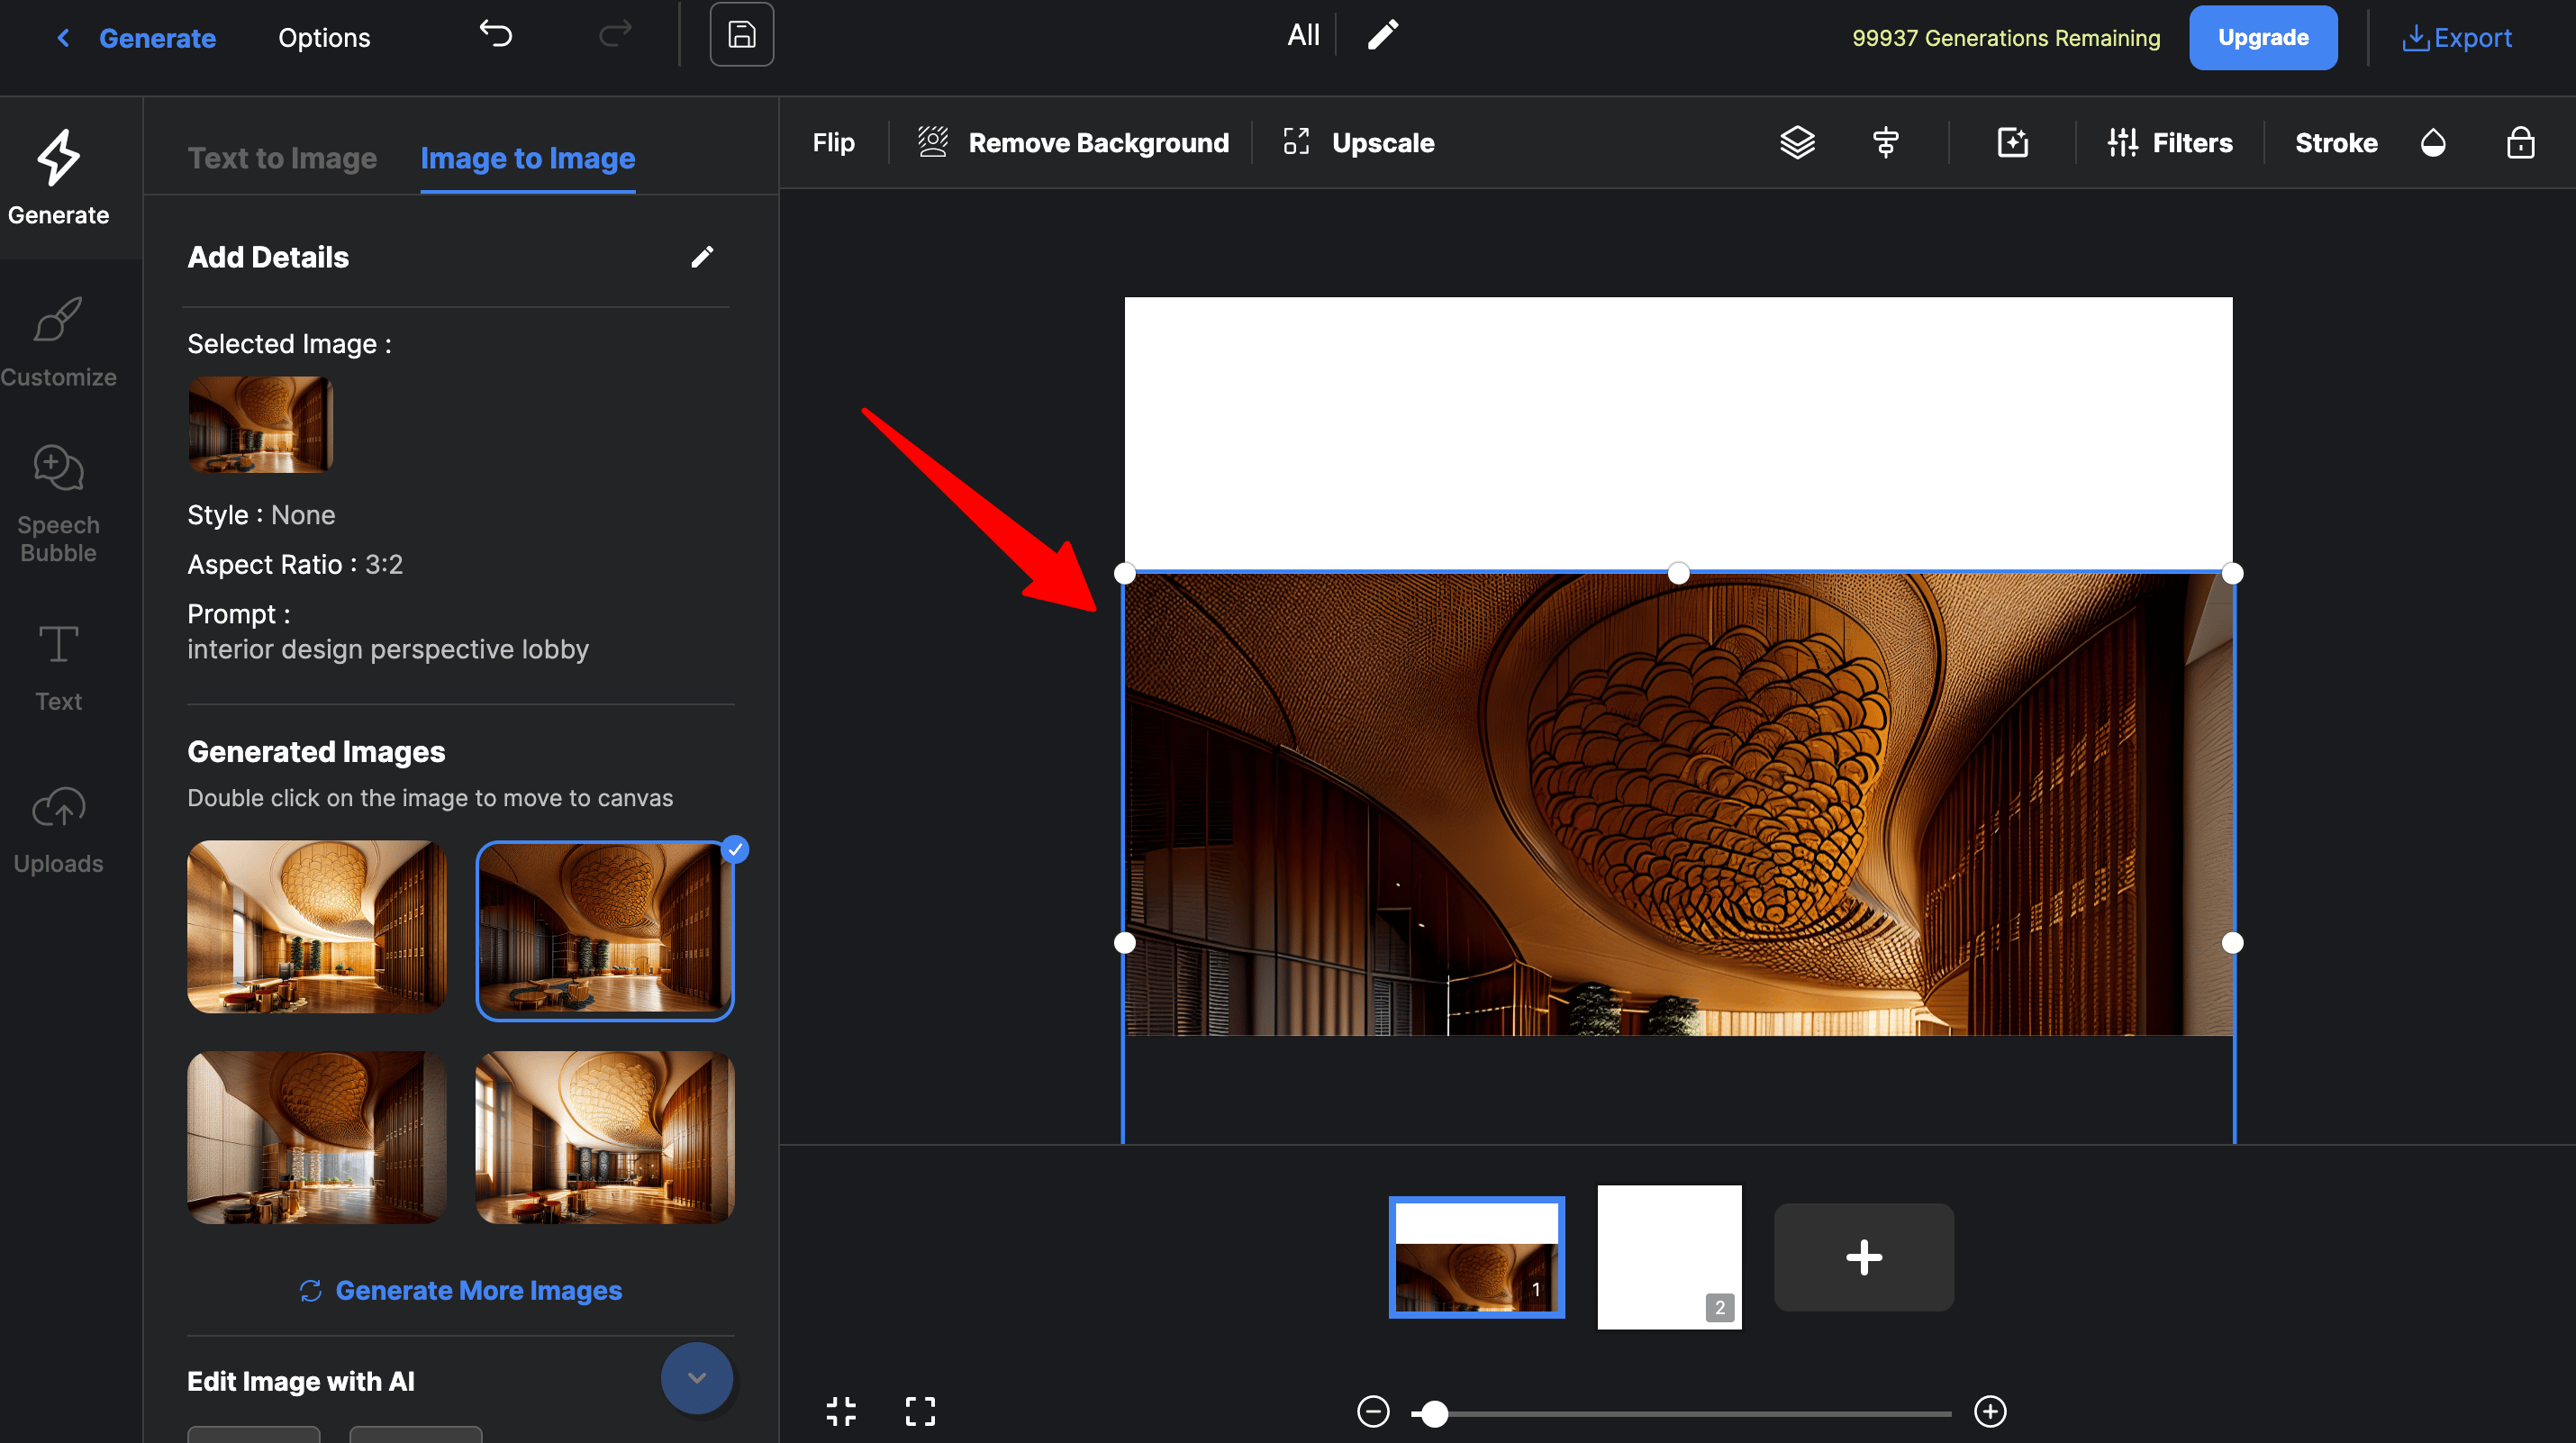
Double-click on the image that you want to select. It will move the image to the white canvas. Now click on adjust frame on the top right to fit the image in the frame. Finally, click on Upscale and autodraft will generate an upscaled version of the image.
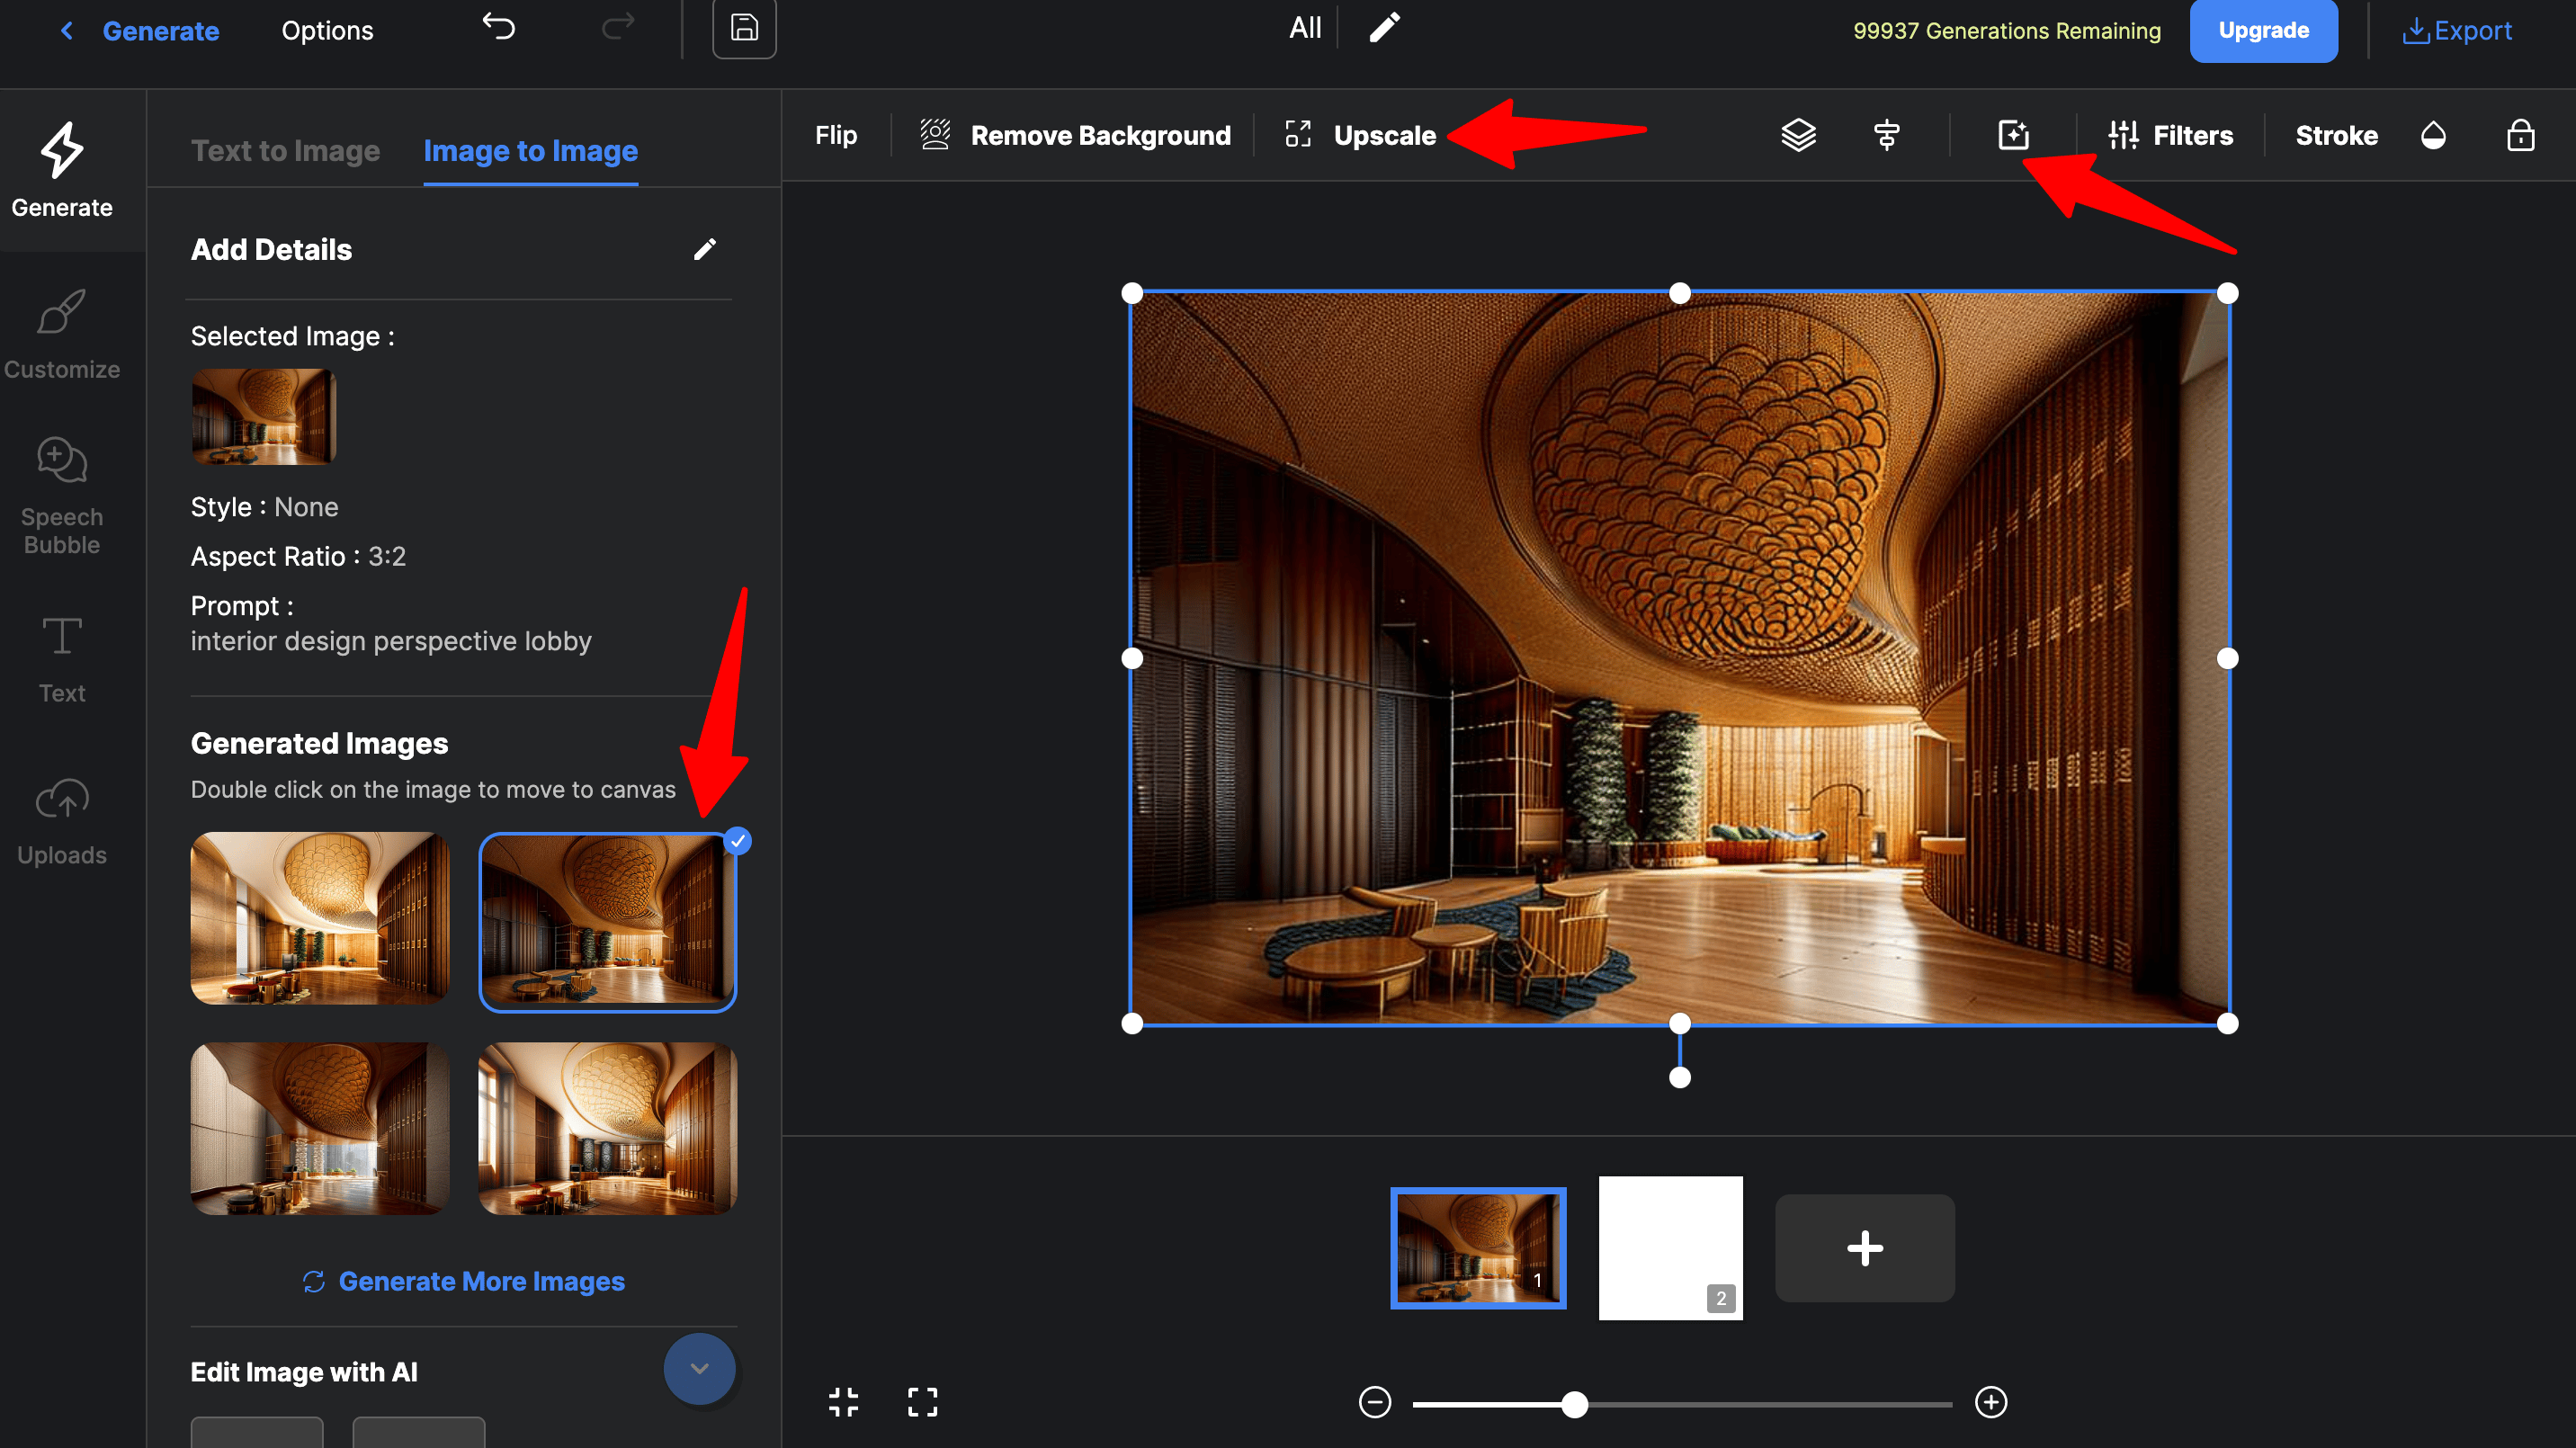
Once the image is upscaled again click on the adjust frame on the top right to fit the image in the frame. You can also manually drag or zoom in/out the image to fit in the frame.
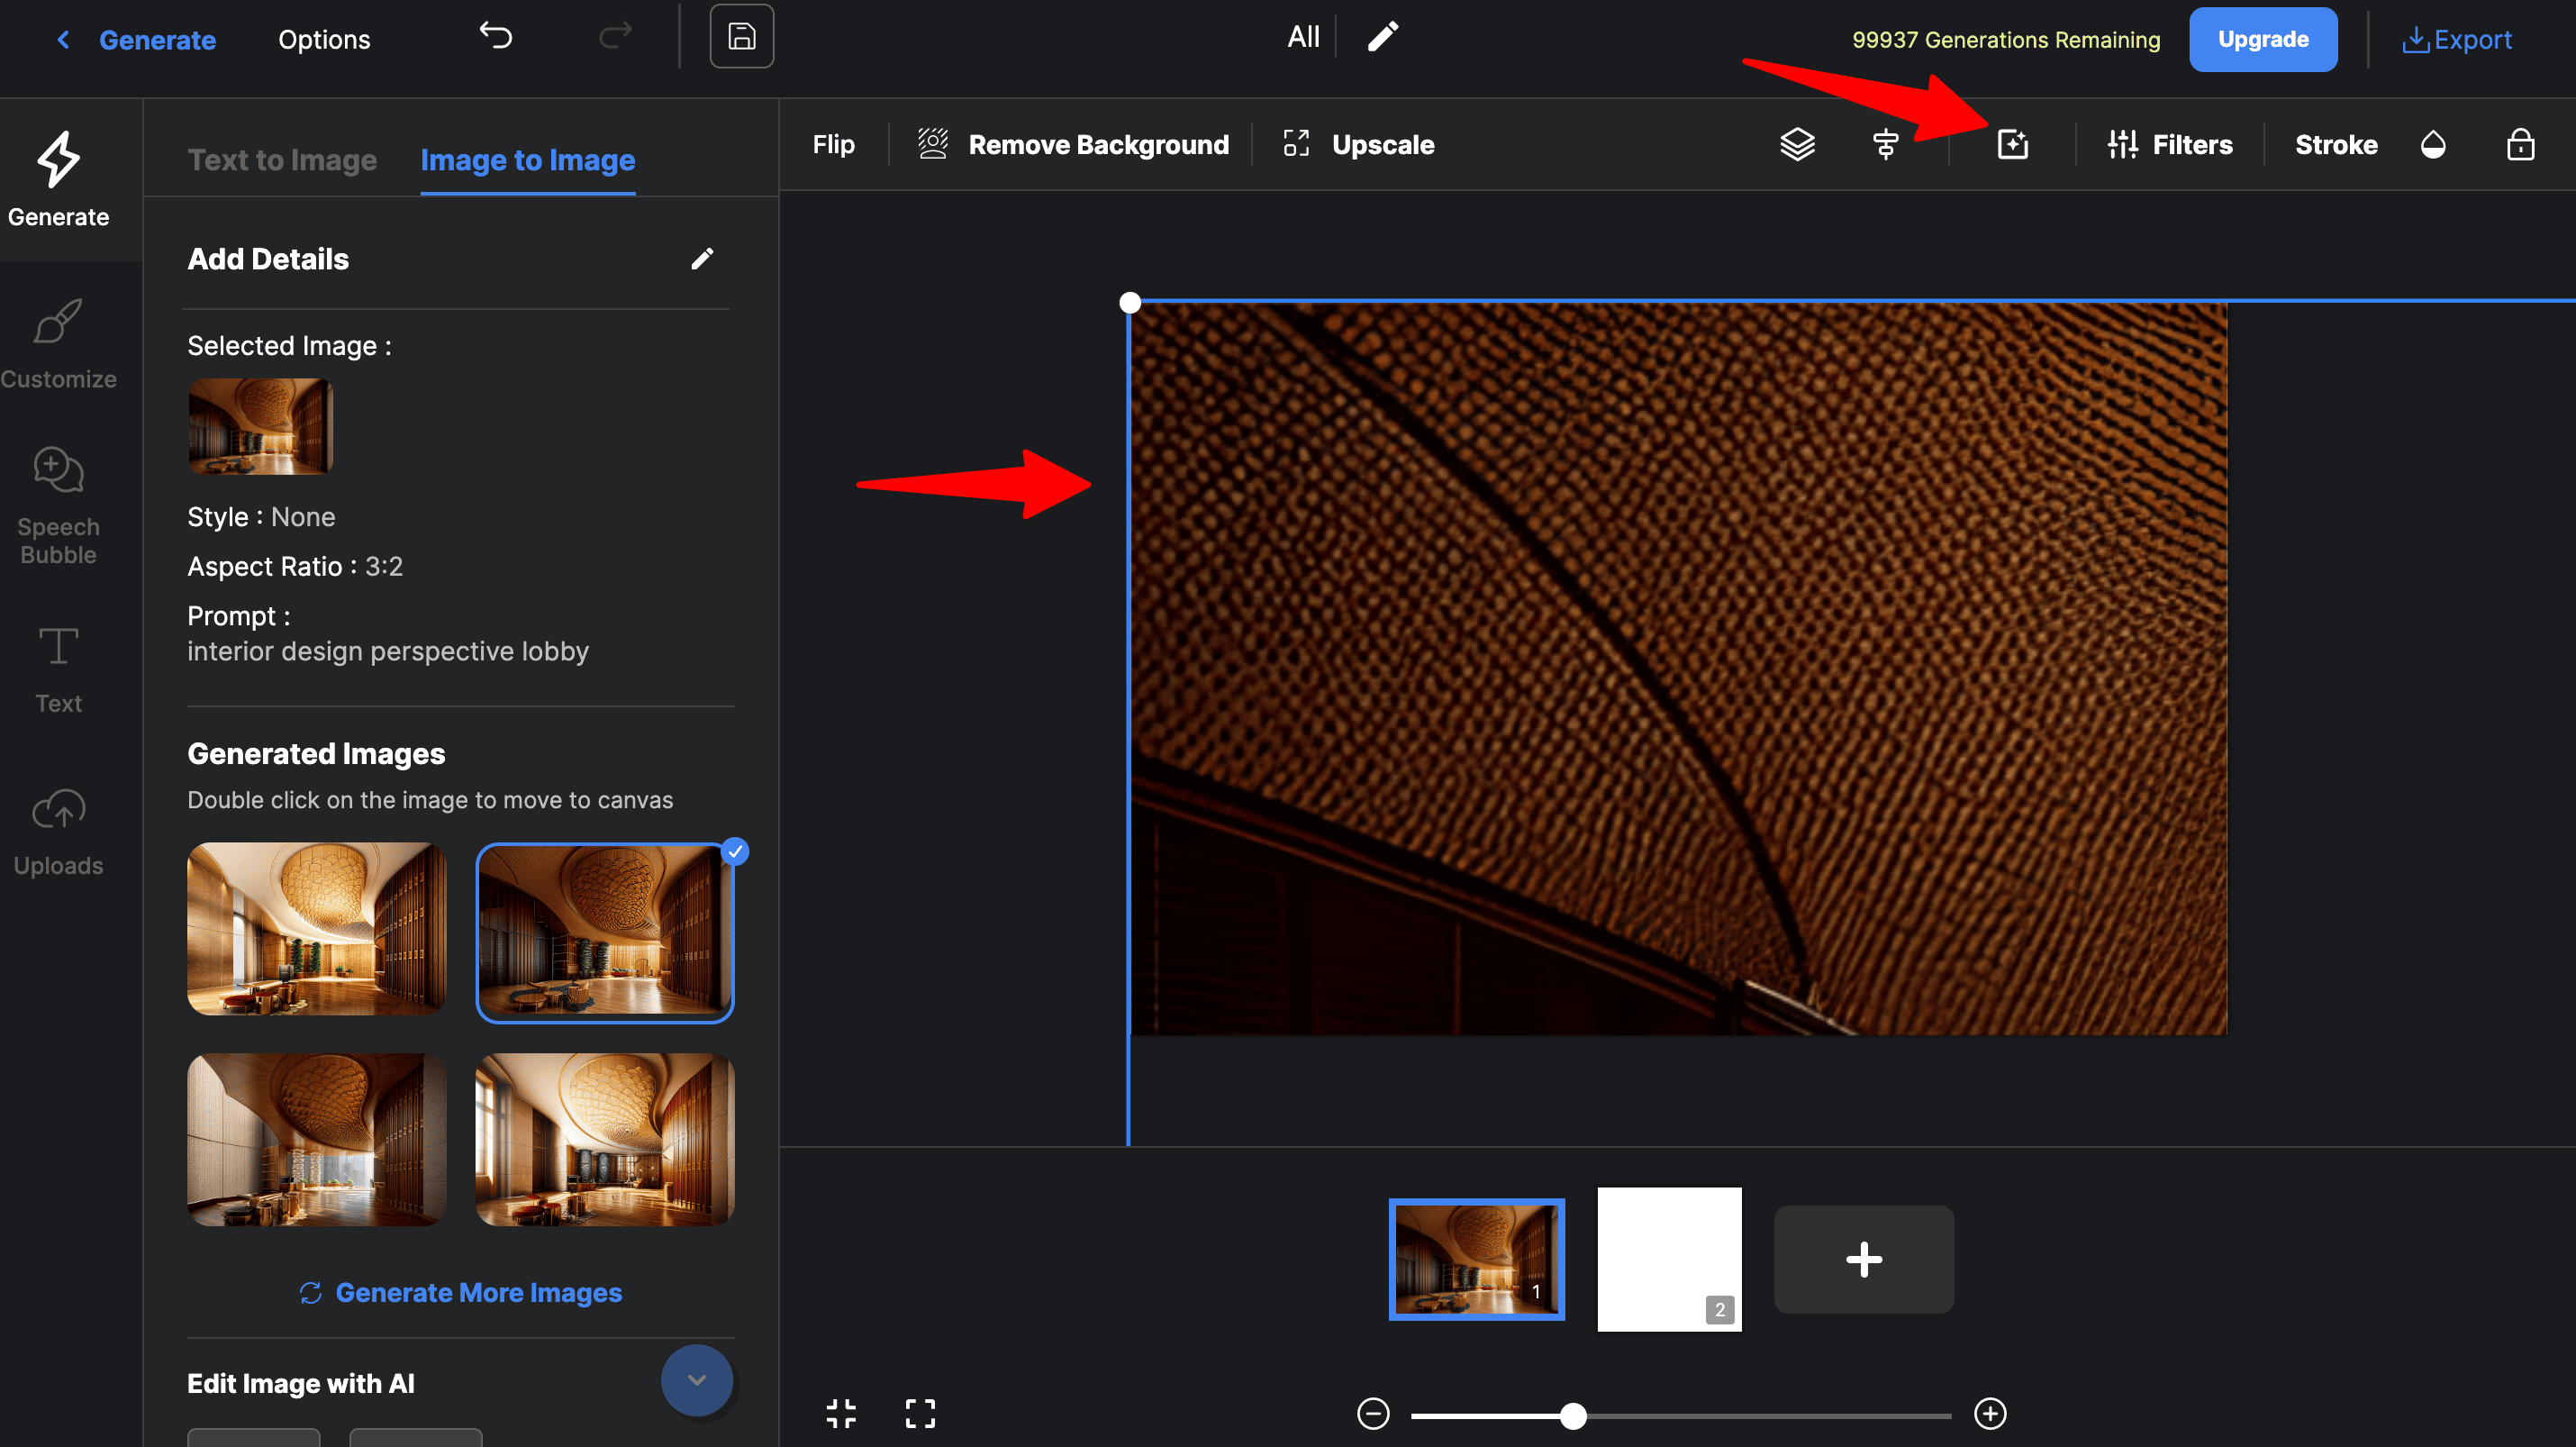
Pro Tip: Remember to keep only a single image and remove all other images on the white canvas to avoid issues in upscaling and fitting the image into the frame. For this, you can select the image on canvas and press delete on your keyboard or simply put the image that you want to upscale on the new canvas screen as shown below.

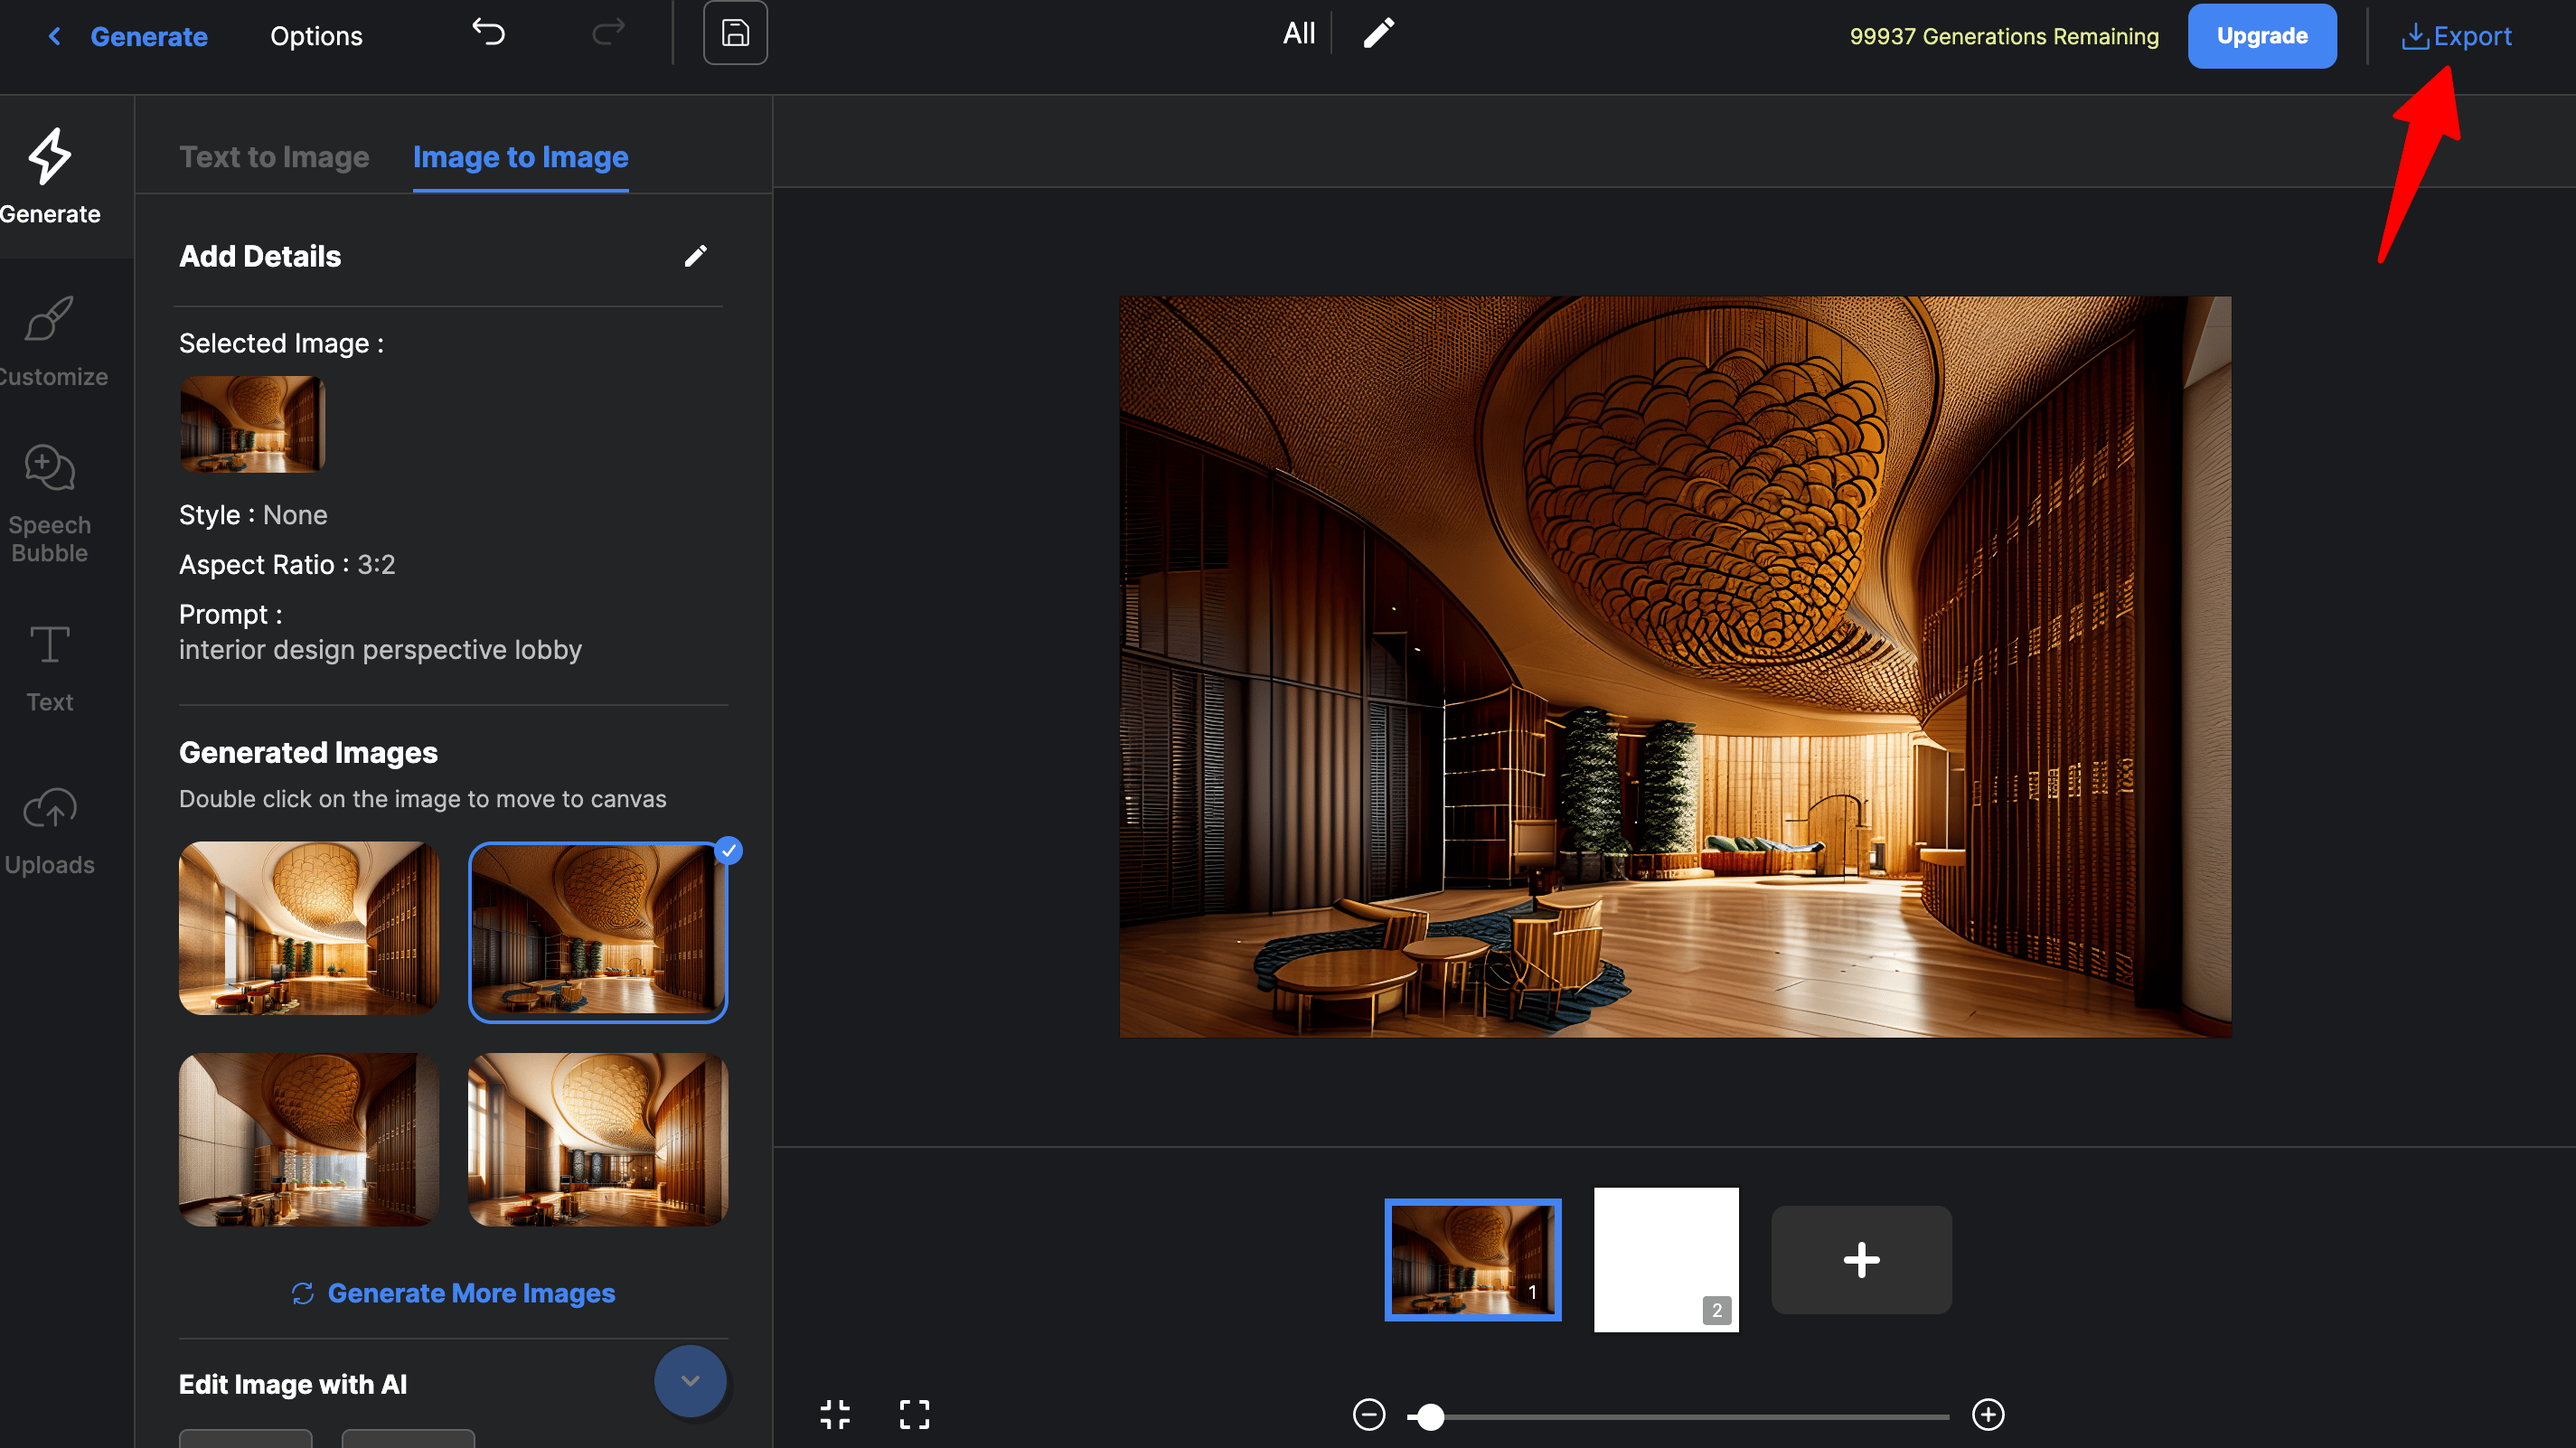
Finally, you can proceed to download the colorized version of your photo. Click on the Export on the top right.
By following these simple steps, you can effortlessly transform black and white photos into vibrant color representations using Autodraft.
Can You Colorize Old Photos?
Yes, you can colorize old photos, the process remains the same as we have discussed in the above section. In short, it can be done in 3 simple steps:
- Upload black and white photo in autodraft's image-to-image art generator
- Choose deep copy in styles & enter prompt
- Click generate images
The ease and accessibility of online colorization tools enable you to unleash your creativity and explore the endless possibilities of adding color to your cherished memories.
Conclusion
Now that you're equipped with the knowledge of how to colorize black and white photos online for free, it's time to unleash your creativity and bring your own images to life. Whether it's turning a family heirloom into a colorful masterpiece or transforming a historical image into a vivid representation, the power to create is in your hands.
Don't hesitate to experiment with different styles, effects, and settings to achieve the desired look and feel for your colorized photos. Embrace the journey of discovering the beauty and potential hidden within your black and white images.
We are at the end of this detailed guide and hopefully, you will find it helpful. Autodraft has other efficient tools as well: Text to Image AI Art Generator, Image to Image AI Art Generator, AI Paint. So, what are you waiting for? Dive into the world of colorization and let your imagination soar.