How to Make Animated Videos For YouTube - Free AI Animation Generator
Ever watched a funny animation skit or video on YouTube and thought, “How do people even make this stuff?” Good news—you don’t need to be a professional animator or spend thousands on software to create animated videos anymore.
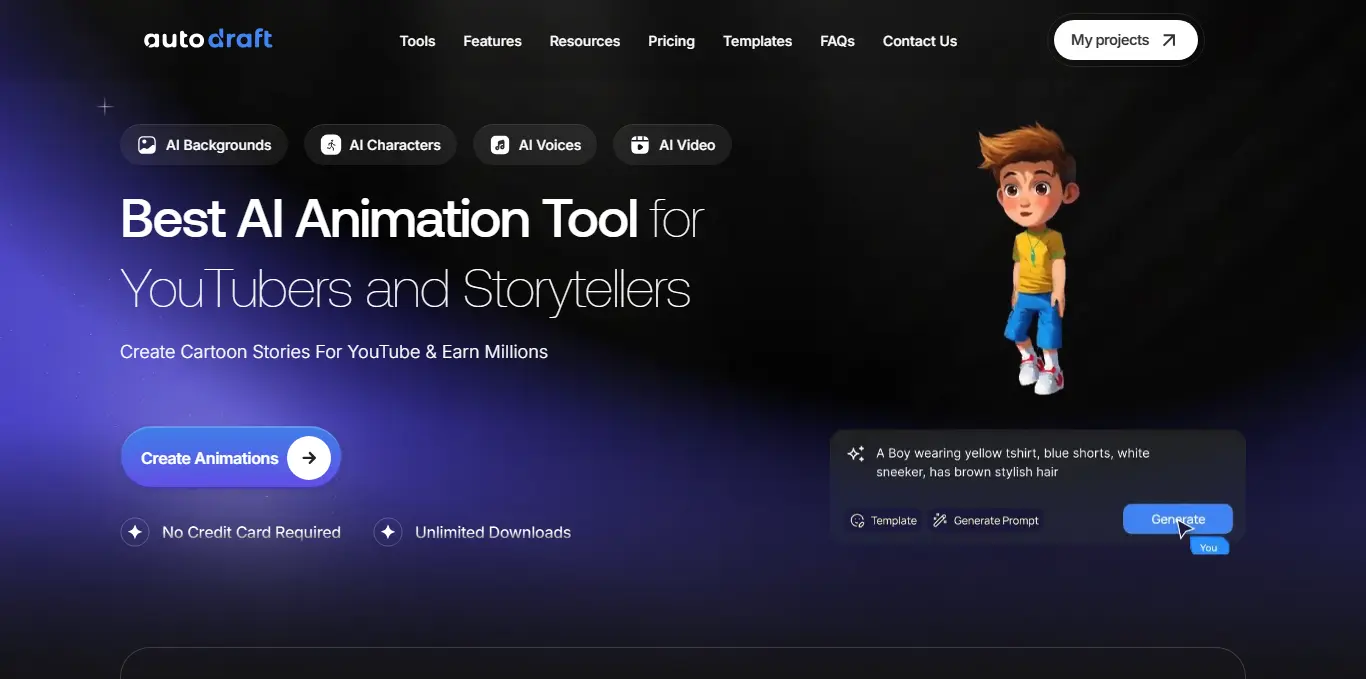
Thanks to free AI Animation Generators like AutoDraft AI, creating animations is as simple as typing an idea.
If you’re a beginner looking to start a YouTube channel or just curious about how to turn your scripts into animations, you’re in the right place.
Whether you want to tell a story, explain a topic, or just have fun experimenting with characters and scenes.
In this guide, we’ll show you how to go from idea to creating a complete animated YouTube video all using free, browser-based tools that work even if you don’t know how to draw or animate.
Let’s get started.
1. Plan Your Animation Video Idea
Think of your animation video like a mini-movie—you need a concept, characters, and a rough idea of what happens.
Start with the purpose or script of your video. Is it meant to entertain, explain something, or promote a product? If you’re making content for YouTube, think about your audience: Are you creating comedy sketches, educational videos, or storytelling content?
Once you know the goal, outline your script or story. Don’t overcomplicate it—just write down:
- A simple setup (What’s happening?)
- Characters (Who’s involved?)
- A conflict or twist (What’s interesting?)
- A resolution (How does it end?)
You can write your script directly in plain language—this helps when using AI tools like AutoDraft, which can interpret your text to build scenes automatically.
Example Idea: A robot who wants to become a chef in a human kitchen, but keeps messing up. This kind of concept works great for animation, especially when paired with fun character reactions and voiceovers.
Once your story is ready, you're all set for the next step: creating characters that bring your idea to life.
2. Create Your Anime Characters (Free with AutoDraft AI)
Once you’ve outlined your animation idea, it’s time to bring your characters to life—and you don’t need to be an artist to do it.
With AutoDraft AI, you can generate original animation characters just by typing a short description. The platform uses AI to turn text prompts into visual characters, which you can then customize to match your story.
Here’s how to get started:
Step 1: Visit AutoDraft AI and sign in. Step 2: Create a New Project and select the Character Generator button.
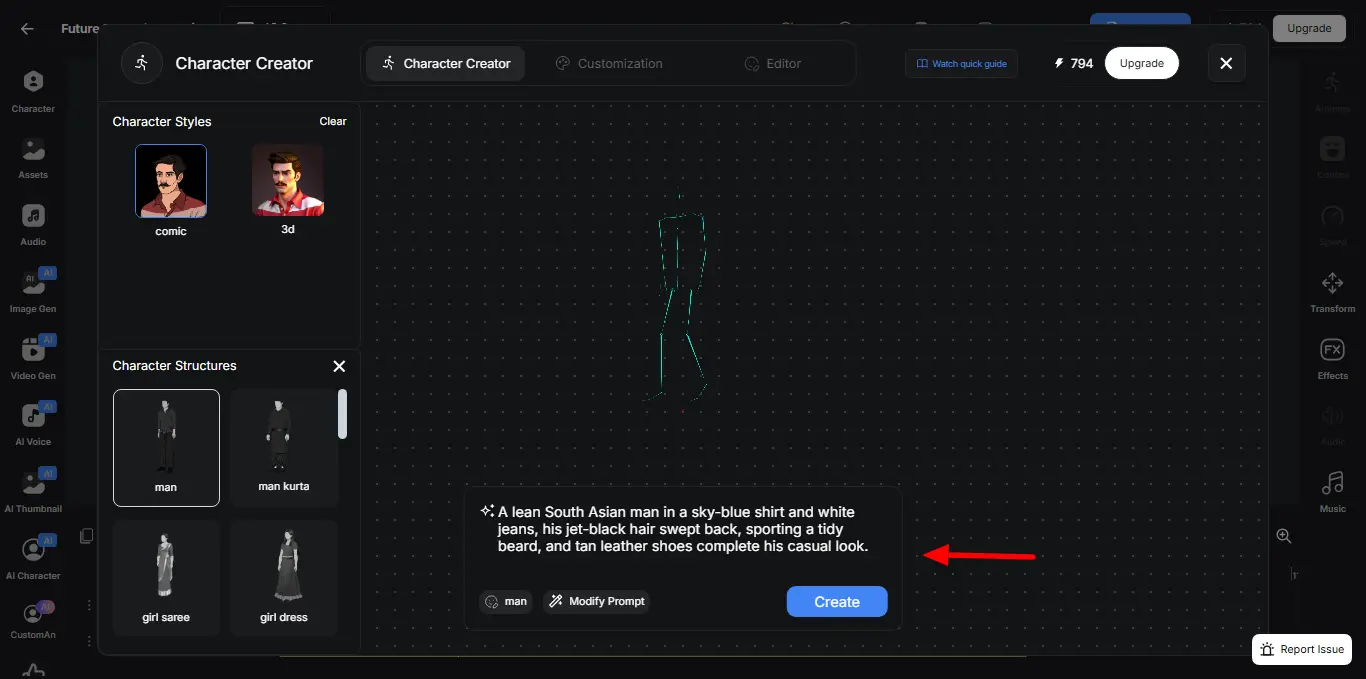
Step 3: Type a prompt description like:
- “Cute robot with big eyes and chef hat”
- “Angry talking potato with a detective coat”
- “Teenage superhero in a hoodie with lightning powers”
Within seconds, AutoDraft will generate multiple character variations based on your prompt. Choose the one you like best or refine the prompt for different results.
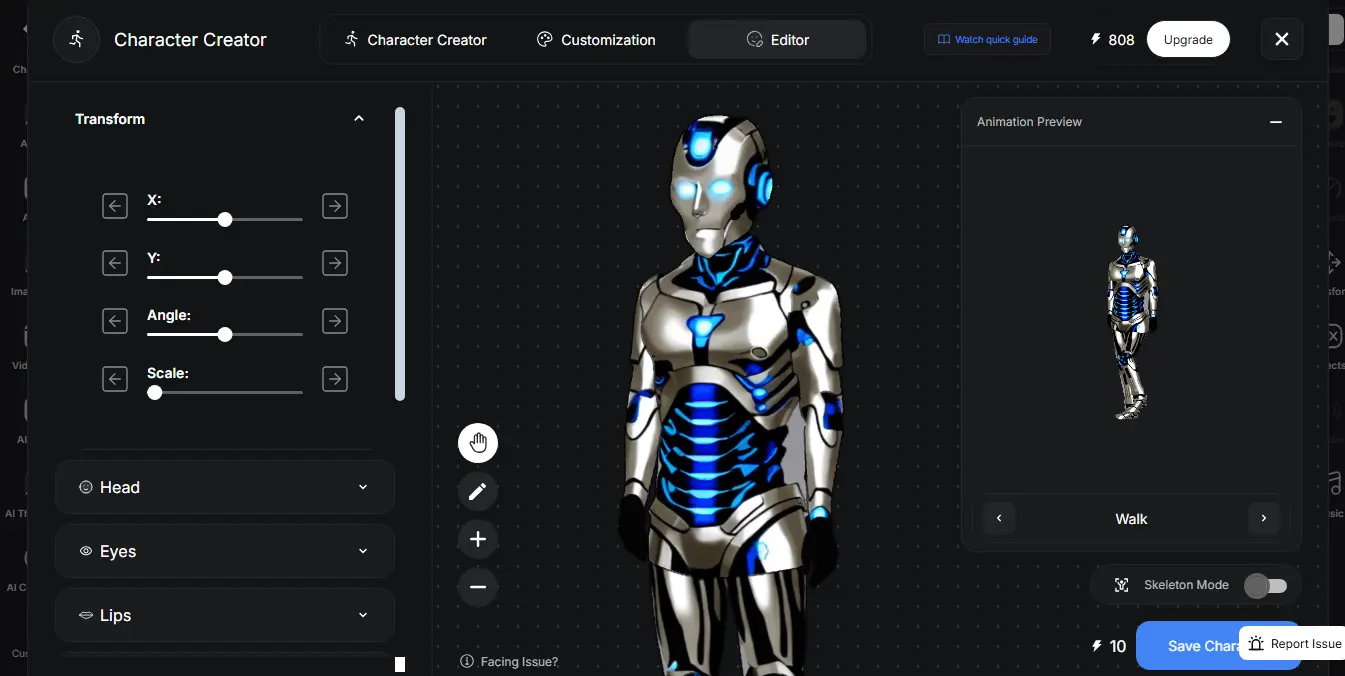
Step 4: Customize your character using built-in tools: change facial expressions, body type, clothing, and colors to suit your video style.
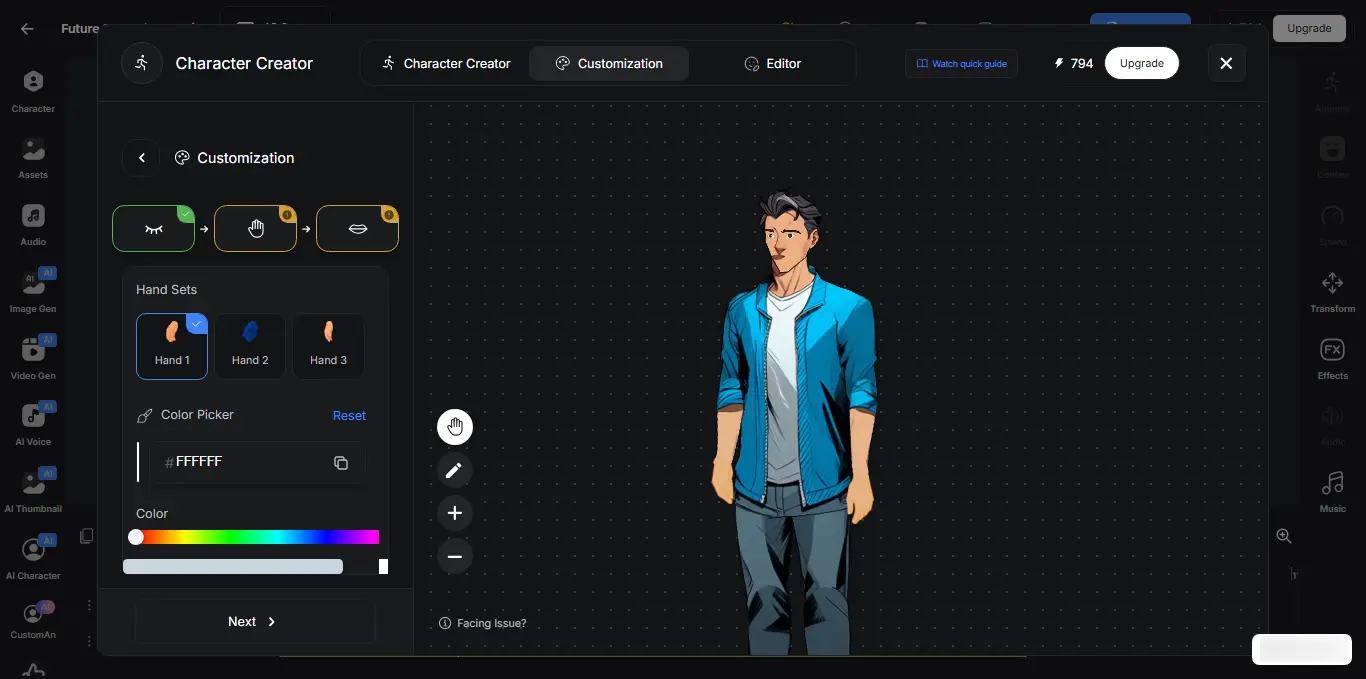
You can create as many characters as you need—main characters, background extras, even pets or props. These assets can be saved and reused in future videos for consistency, especially helpful if you're building a YouTube series.
If you want a more detailed walkthrough on character creation and movement, check out our full guide on How to Create a Custom Character Animation.
3. Build Animation Scenes Using AI Backgrounds
Now that your characters are ready, it’s time to place them in a scene, and AutoDraft AI makes that part just as easy. You don’t need to draw anything manually or search the web for stock backgrounds.
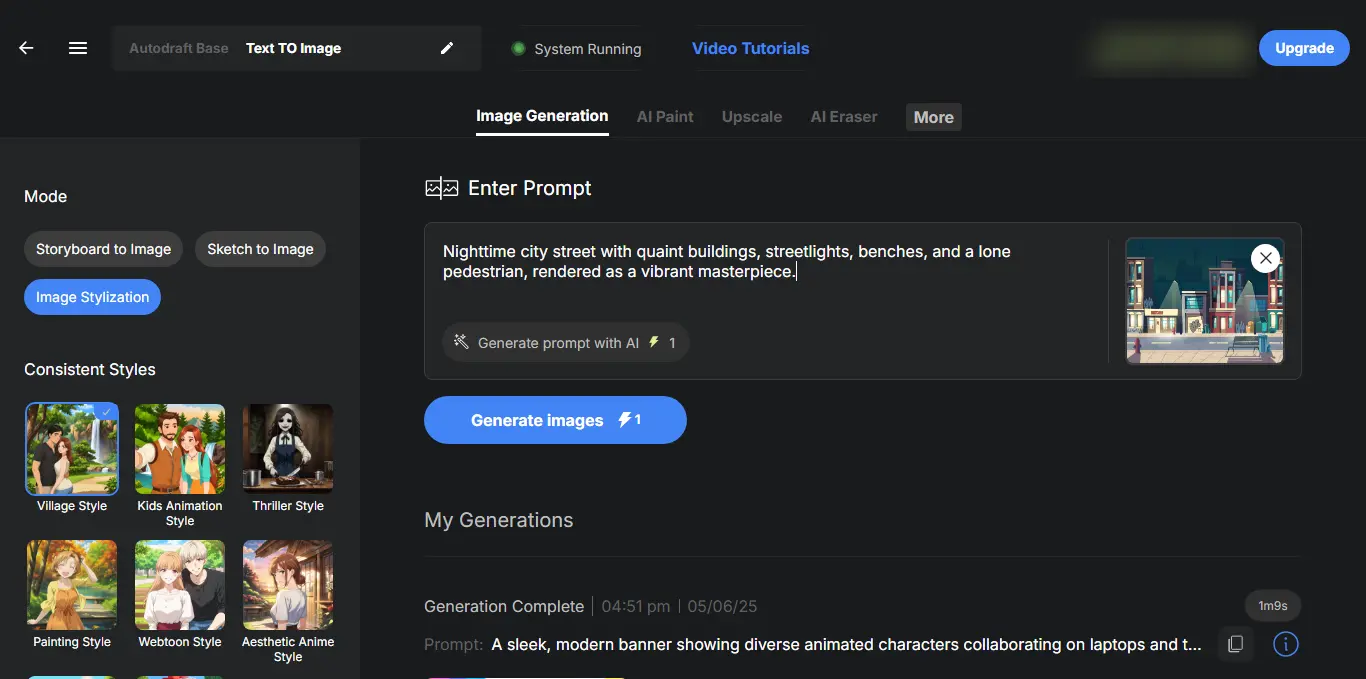
Instead, use the AI Background Generator to instantly create settings based on a simple description or a reference image.
Whether your video takes place in a sci-fi city, jungle temple, or school classroom, just type it out and AutoDraft will generate detailed, stylized visuals that match your animation theme.
Example Prompts:
- “Futuristic city skyline at sunset”
- “Anime-style jungle with ancient ruins”
- “Fantasy village with mushroom houses and fog”
If you're new to generating visuals with text, don’t worry— Check out our **step-by-step guide on converting text to images (AI Backgrounds)**to create high-quality AI backgrounds effortlessly using simple prompts.
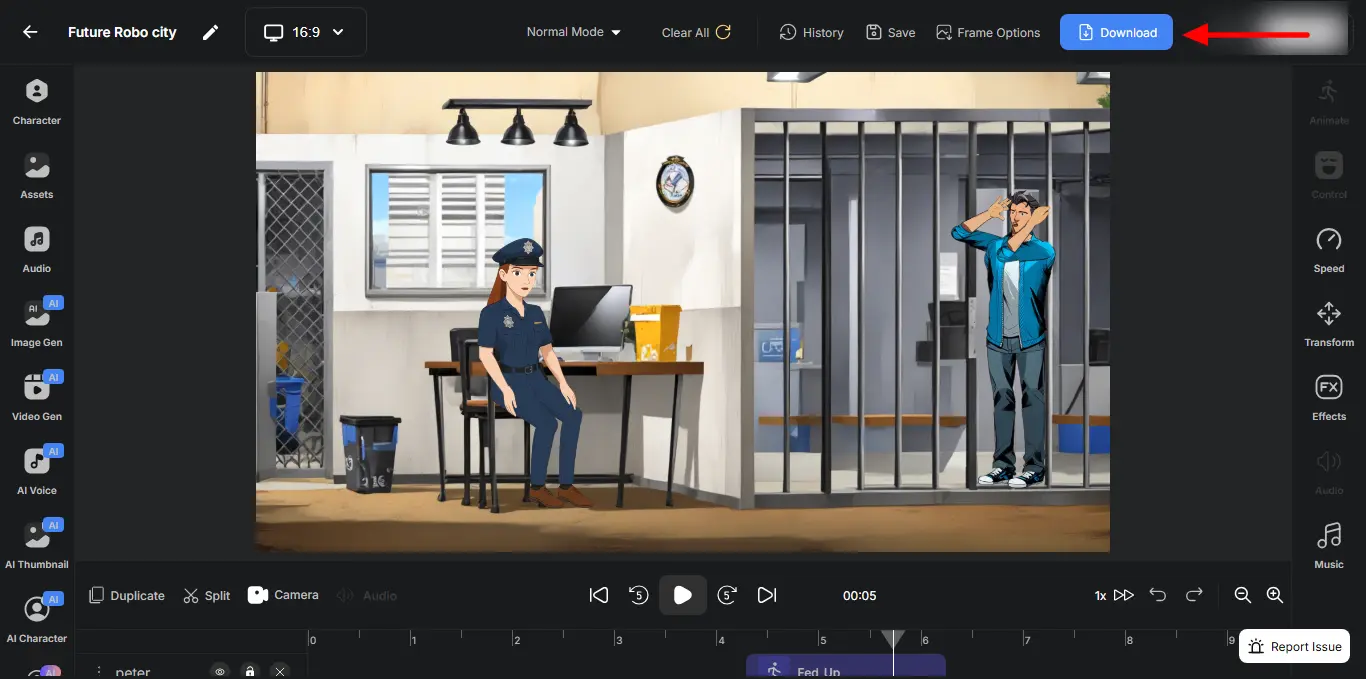
How to Create a Custom Animated Scene?
Once you have your background ready, simply follow the steps as follows:
Step 1: Drag and drop your character into the timeline from the Character toolbar.
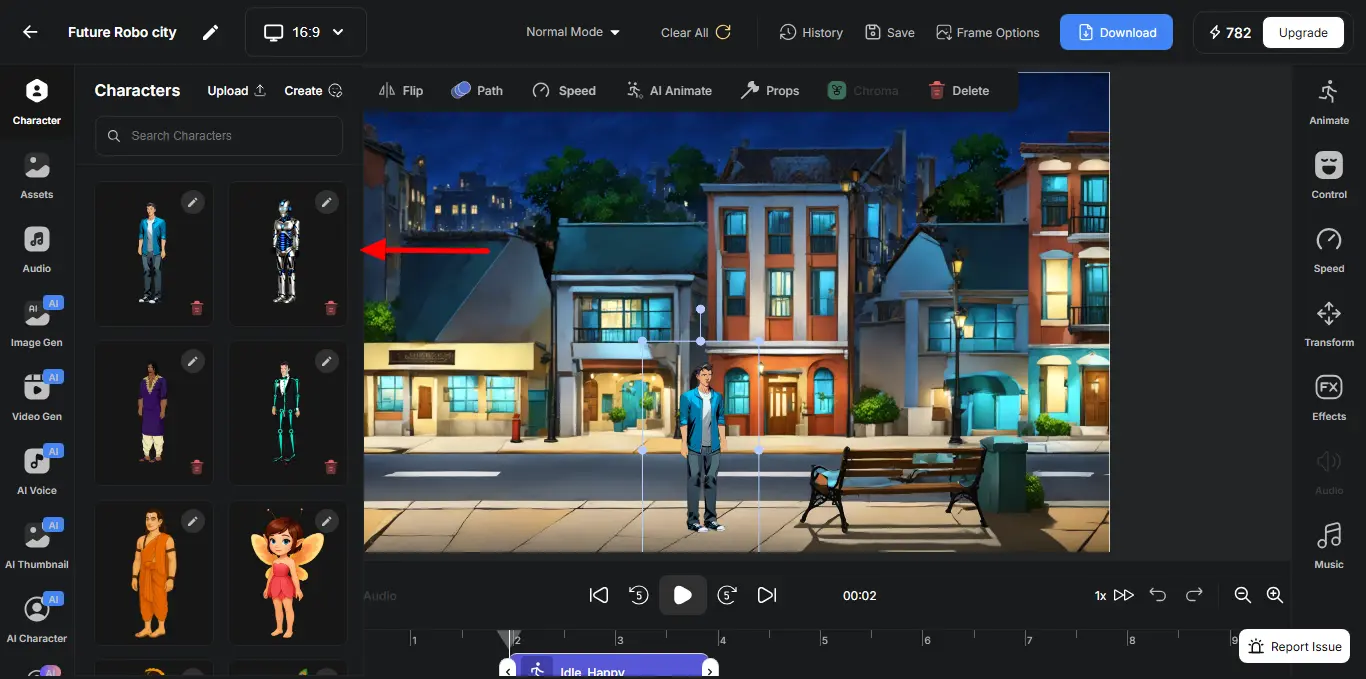
Step 2: Add props to your character using the asset library—things like chairs, food items, or weapons. Step 3: Use pre-built animations to make the scene come alive: have characters walk, talk, wave, or react.
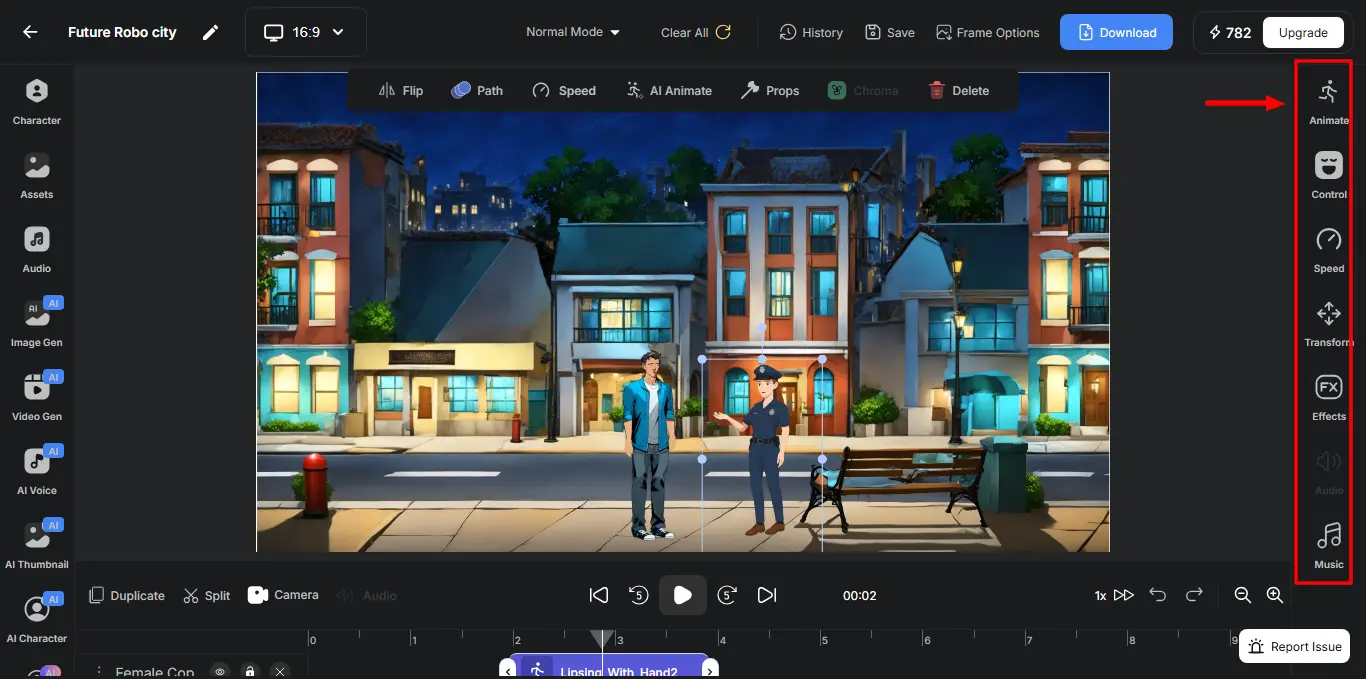
Step 4: Camera tools let you zoom in, pan across, or switch angles for dynamic storytelling. You can build multiple scenes this way and chain them together using the timeline view. With everything in place visually, your animation story is starting to take shape.
Want a detailed explanation? Watch our quick tutorial on **How to create a Scene with AutoDraft AI **and follow along as we build an animation scene.
4. Add Voiceovers with AutoDraft’s AI Voice Generator
Once your scenes are set, it’s time to give your characters a voice. With AutoDraft AI’s Text-to-Speech tool, you can create realistic voiceovers for your animation videos without needing a mic or recording setup.
Here’s how it works:
**Step 1: **Select the “AI Voice” option from the left-hand toolbar.

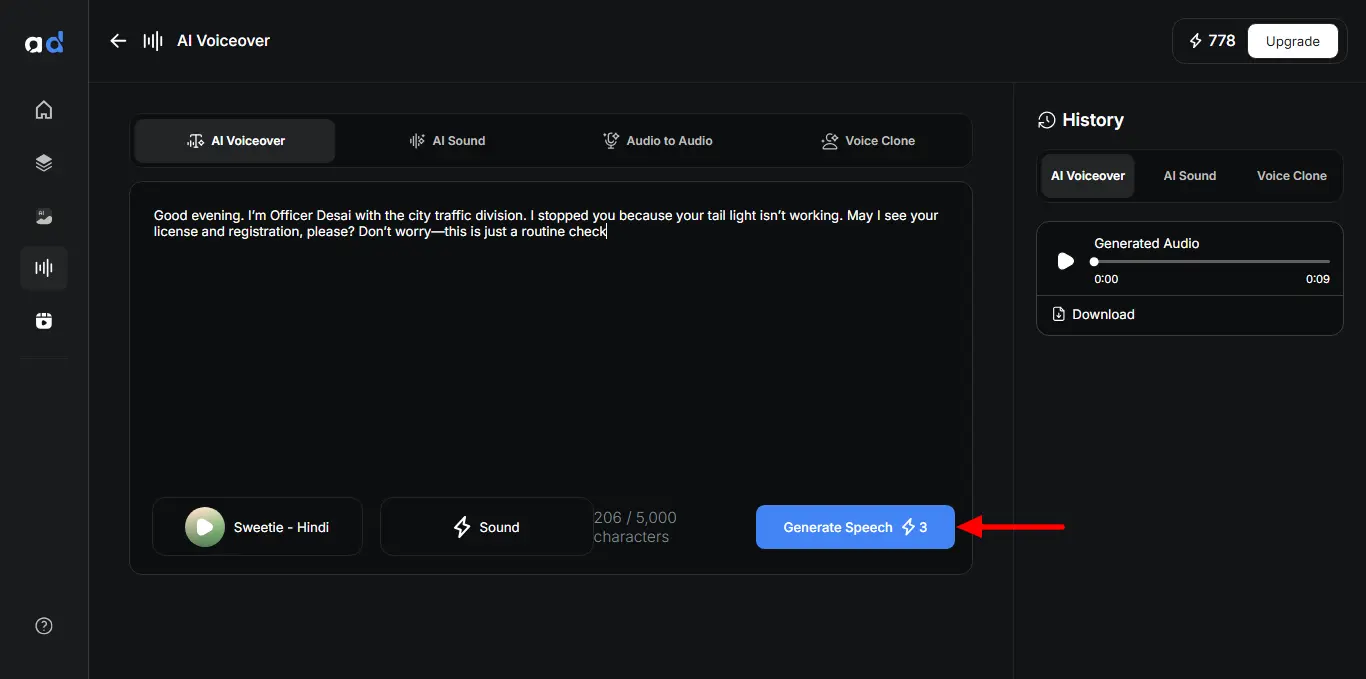
Step 2: In the AI Audio Generator panel, type your dialogue into the “Text to Voice” box. Then select a voice that fits your character.
Choose from a wide variety of AI voices. You’ll find:
- Different accents (US, UK, India, Middle East, etc.)
- Multiple age groups and tones (friendly, serious, excited)
- Styles: Calm, serious, cheerful, young, elderly, etc.
Step 3: Adjust the speed, pitch, and tone for more control. Want a calm narrator or a hyper kid voice? It’s all possible.
Step 4: Hit Generate, preview the voiceover, and click “Add to scene” to lip sync with character animation. You can also download it for further use.
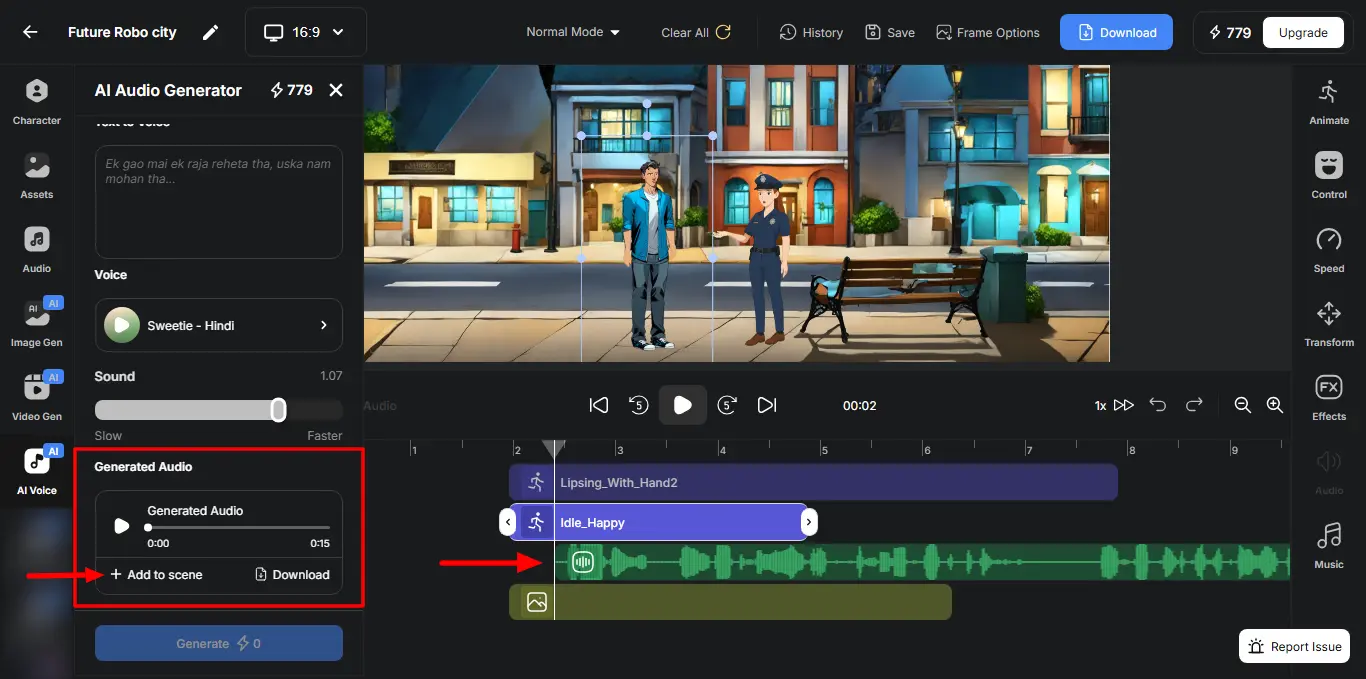
This step instantly adds a voice clip to the timeline. Now you have more life and personality to your characters. Use the Split feature to properly lip-sync the voice.
You can assign unique voices to different characters and even clone your own voice for more personal storytelling. Want to add voice-overs like a professional? Check out our Full Guide On Converting Text To Audio For Beginners to explore voice styles, advanced settings, and other tips
5. Add Music, Backgrounds & Final Touches
With your visuals and voiceovers ready, it’s time to bring everything together and polish your animation video.
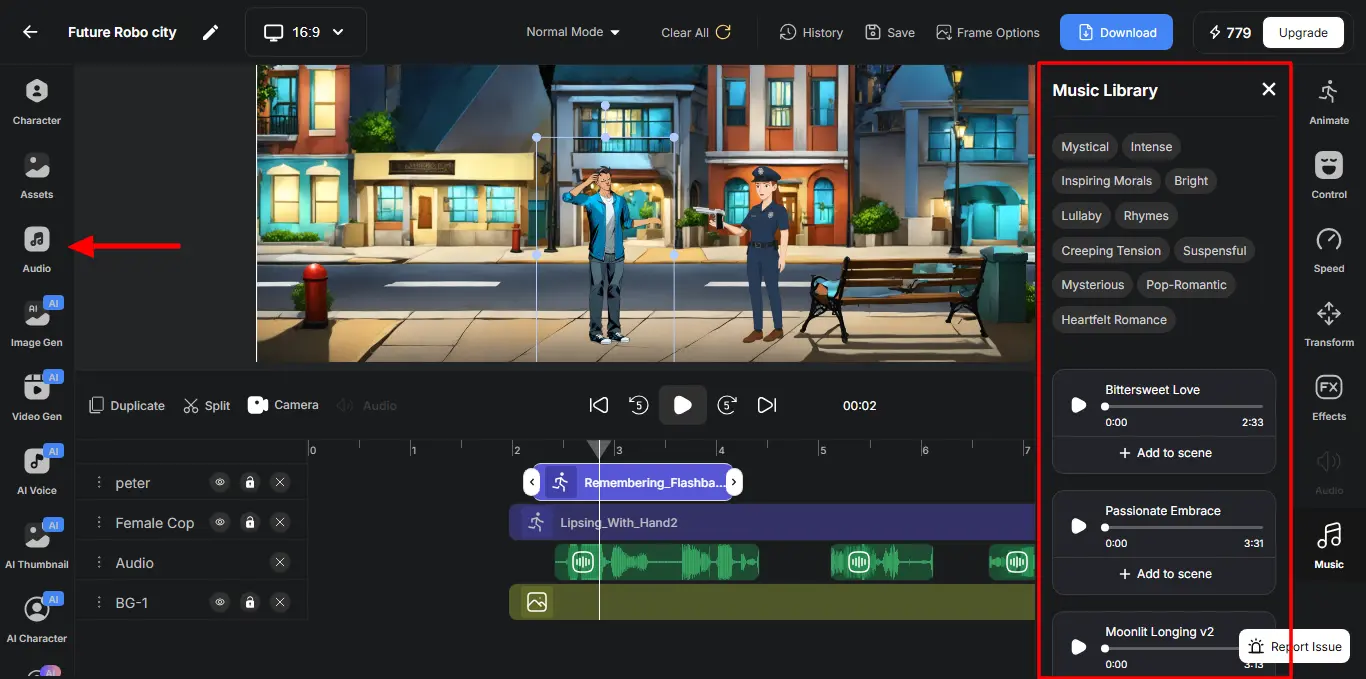
First, let’s add background music. AutoDraft includes an AI Sound Generator that creates royalty-free music, or you can choose from the free music library based on the vibe you want.
Just type a mood prompt like “playful jazz for kids” or “epic synth for sci-fi,” and it’ll generate a fitting soundtrack. You can also adjust the volume to keep it balanced with voiceovers.
Next, set your backgrounds and environmental sounds. Whether you want a classroom, jungle, space station, or fantasy world. It ensures your settings match the tone of the story without needing stock images or audio.
Need some final changes? You can:
- Add on-screen text or captions for clarity.
- Use scene transitions or animated effects.
- Sync everything perfectly on the timeline, from visuals to sound.
Once satisfied, just hit Download. Your animated video is ready in HD or 4K—ideal for YouTube, Instagram, or any platform you’re targeting.
And that’s it — Your Animation Video Is Ready for YouTube!
With characters, backgrounds, voiceovers, music, and final touches all in place, you’ve successfully created a complete animated video without complex tools or expensive software.
6. Upload Video to YouTube and Optimize
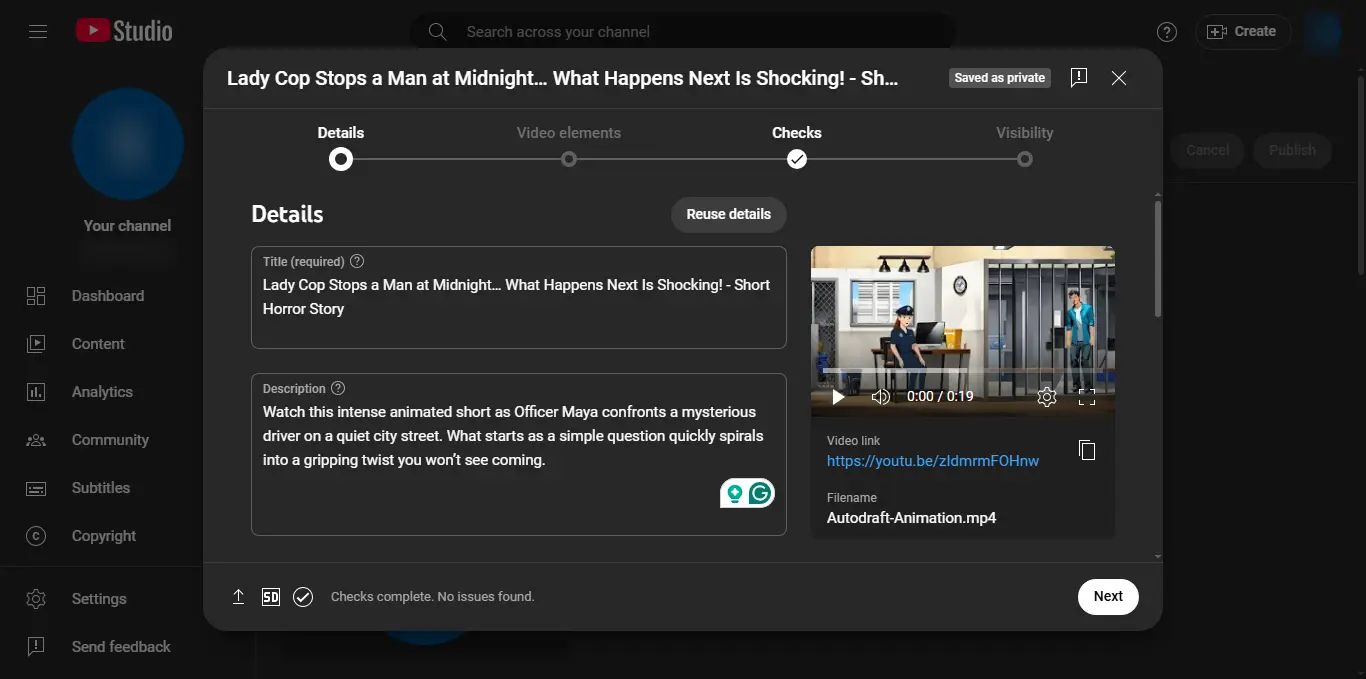
Once your video is ready, it's time to share it with the world on YouTube. Don’t rush this part—optimization is just as important as content creation when it comes to growing your channel.
If you want to turn your videos into income, check out our detailed guide: How to Earn Money From YouTube – Ultimate Beginner’s Guide.
It covers multiple ways to earn, understanding YouTube monetization, and tracking earnings.
Remember every great YouTube channel started small, so stay patient and persistent.
Key Takeaways
Creating fun, engaging animated videos for YouTube is no longer limited to professional studios or expensive software.
With beginner-friendly, free tools like AutoDraft AI, anyone, even without design or animation experience, can bring ideas to life with ease.
From** generating characters and scenes to adding voiceovers**, every step is accessible and doable in just a browser.
So why wait? Start crafting your very first animated video today. Your next viral video could be just a few clicks away!
👉 Create Your First Animated Video For Free!